So like I was saying a few days ago when i posted the last installment I wanted to save the contents of this post for a separate blog entry. It covers something completely different and I felt like it kinda deserves its own post, so here we go.
So after going to Japan and being back home for a week, I was just waiting on the CRX motor to come back and started to get antsy. I always feel the the urge to check up on all the normal classifieds sections just to 'see whats out there'. 99% of the time i'm not interested in purchasing anything but i like to see whats around. Lately when i do this I always find myself going back to looking at Honda s2000's and more specifically s2000 CR's. The Honda triumvirate is basically; FF Type-R/NSX/s2000CR Since I have the NSX and I have the euro-R i've been keeping my eyes peeled for a CR that's was in good condition with lowish miles. Again, not that i was planning on buying one but, you know, if the opportunity arose..
So i'm on my weekly once over of the internet and I see one pop up for sale that's kinda local and has a low 53k miles. Against my better judgement I decide that I should call the poster and maybe if he's a cool guy try and set up a time to go and check it out.
After some back and fourth on text I got him on the phone and we quickly realized that we sort of knew each other though track days, we have mutual friends and he follows me on Instagram. After hitting it off and talking about the car, we decide that i was going to meet up at his house the next day.
Well next day showed up and I took a look at the car. There were some cosmetic problems with some paint like spider cracks on the front bumper and some sun fading on the trunk, but mechanically everything was flawless. The car was stock other than an aftermarket stereo, air intake and some swift springs fitted to the oem shocks. He still had the OEM stereo and the stock airbox and they were going to the new owner. He didn't have the stock springs but that didn't really matter to me as the Swifts give the car a lower stance and less body roll and are lauded for their quality.

Well as you can imagine after looking at these cars online for so long seeing one in front of my eyes that was for sale and ticked all the boxes, it was hard to say no. Especially for the price; and especially since good solid low mileage ones are getting harder and harder to find for sub 45k.
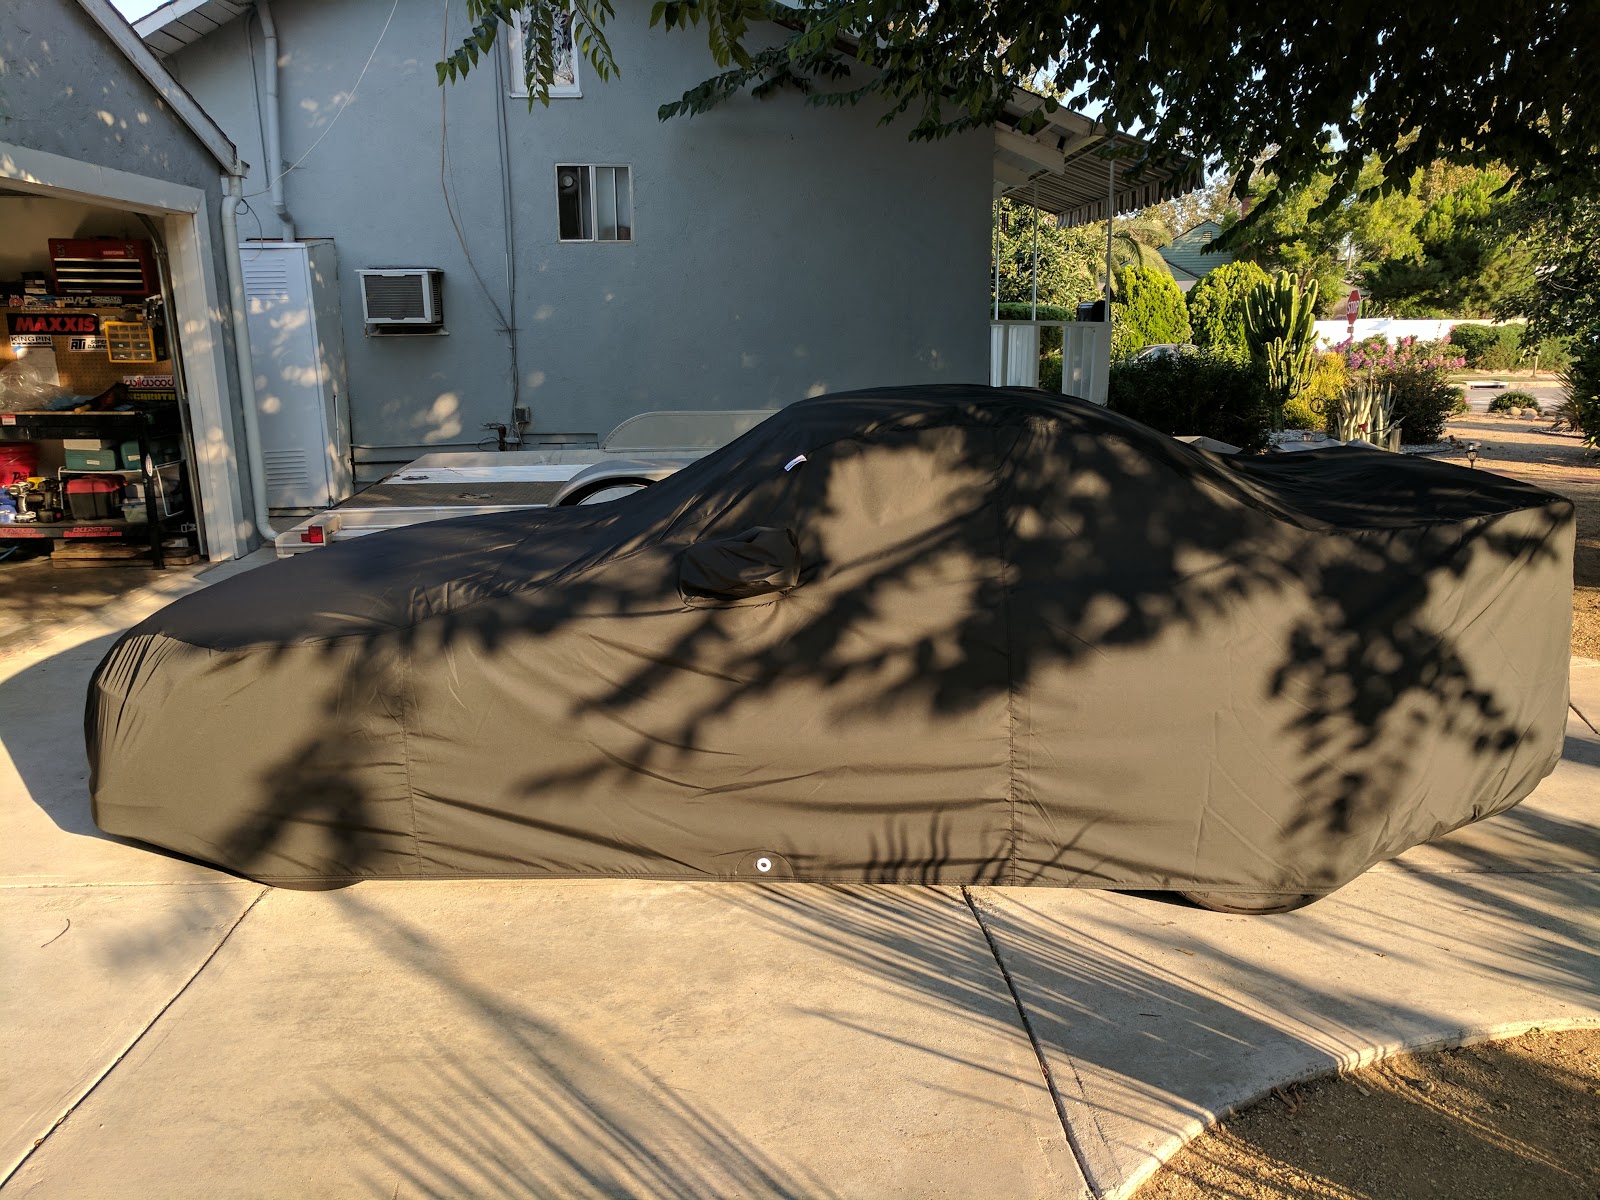
Next thing you can probably guess we were on our way to AAA to get the paperwork signed over.

The plan was to refresh it as needed but keep the soul of the CR so CR specific things would not be messed with. I wanted a car that i could hop in and take out to a track event without any drama, but also drive it up in the canyons on summer evenings if I wanted.
Literally within the first 30 min of bringing it home I had the entire dash apart so I could pull out this 'premium alarm' system that the previous-previous owner had installed. At some point this alarm was pretty state of the art, but like with ALL aftermarket alarms, no matter how good they are- they NEVER age well.

I replaced or reconnected any wires that had evidence of self tapping power clips, I also replaced or re sleeved any section of the main ignition wires that they had used for ignition kills or main back up power. This is all a pain in the ass to do under the dash, as with anything, but also not something I'm about to pay some shop to gouge me 500 bucks to do.

Everything fixed and reclipped into the OEM provisions again. I'm glad I know how to do this type of thing now.

This is literally like 3lbs of wire, relays and brains that were all stuffed under the dash and hood. Good riddance.

Another thing that I wanted to take care of was, again, of the previous owners doing.. At some point he had plasti-dipped sprayed his wheels in a bronze/gold color. (i donno why someone would want to change the CR only wheel color, but apparently he did.) After researching different sprays developed for removing plastidip I settled on some good old goof-off remover.

It was a tedious process to do each of the 4 wheels without a power washer but eventually got it all done with a aluminum wired brush and some elbow grease.

Unfortunately, I wanted to go the extra step and re seal them with clearcoat, buuut I forgot to use adhesion promoter on the plastic of the newly polished, slick as greased lenses. As i sprayed the clear just dribbled all onto itself and there was nothing i could do about it. Frustratingly this meant that I had to wait a few days for the clear coat to cure enough to be sanded off and then Id have to start the whole re polish process again, from scratch. This was a HUGE bummer.
 |
| after re-polish rd.2 |
When i bought the car it was on 2 new Rs3 tires in the rear and 2 20% PilotSports up front. I could have played musical chairs with the new set of rs3 that i had on the Spoon car but the logistics of picking those up from riverside and then getting everything mounted on the right wheels was a bit of a headache. I decided that I would rather order some brand new rs4 compound tires to give them a try. I'd gather some other brake related parts and make the drive down to San Diego to have Nate who works at Acura as a tech throw everything on the car for me since he has access to his bay lift, tire machine, and air bleeders.

I ordered some fluids, new R4S Porterfield pads, SS brake lines and some standard run of the mill Centric blanks.

I drove the car down to San Diego and we knocked everything out in an afternoon.

 |
| Brake lines |
 |
| New rotors and fresh pads |
 |
| Track alignment, the rear is SUCH a pain in the ass to do on these cars. |

Its amazing how well the car drove with new tires and good brakes and alignment. I forgot how fun these cars are to zip around. The one thing that was now obviously needing to change at this point was the seating position. I am just a bit to tall for the stock CR seats, they do feel a bit lower than the normal s2000 leather seats but they are still just a bit to high for me to really feel like I am sitting 'in' the car and not on top of it.
Lucky for me I have a few seats in storage that would rectify this situation for relatively cheap. After pulling them out i decided on using the Recaro Pole position SPG i had in my NSX before I swapped back to the recovered OEM seats. I bought a PCI non-slider seat rails through Katman and went to set up the seat for the drivers side of the car.
 |
| Still with in competition cert too |
Right around the time the car came out there was a rash of s2000 seat thefts, people would slit the soft top roof, unlock the door then take them and fit them in their shitty Civics and Integras. The previous previous owner had probably read some thread on a forum telling him how to 'theft proof' his seats by making them REALLY hard to remove from the car...
Fast forward to me thinking i was gunna zap the bolts out with a 12mm electric gun only to realize that the front side standard 12mm shoulder bolts had been replaced with m6 allen head loctited into place, with a lock washer and epoxied nuts jammed in the hex hole..
No joke- this too 5 hours laying half under the car half under the dash with a torch at the bottom side heating the bolts to burn away the loctite, all the while gently rocking the allen key loose. The whole time I was watching the allen head expand as i twisted the key just ready to strip or shear off. Against all odds and 5 painful hours later i finally had the two drivers side fronts out. I am so glad i didn't break one off inside the chassis hole. I don't even wanna think of what a pain in that ass though would have been to extract and fix.

Now that I had the seats out i could start to position the seat and seatbelt assembly. I realized right away that the OEM receiver that was designed to connect with the seat base will not work with the now aftermarket seat and rail. The hard plastic neck is to short and would make it impossible to route correctly through the belt hole in the side of the seat. For any seatbelt to work correctly the receiver and webbing need to sit against your hip bones (not over the top of your seat) what came on the car was not going to cut it and I was going to have to figure out a solution.
After looking on the forum i was HORRIFIED to see how hacky and shitty peoples 'fixes' were. The older i get the less and less I trust anything i read online.
After about 10 min of thought I had gathered a list of stuff that i needed to do this correctly.
I ordered 2 inch DOT approved seatbelt webbing. 2x '3-bar' 2 inch sliders. and a 2-inch bolt tab. I also got a receiver that would fit the 08 s2000 buckle.

I cut the webbing and buckle off the extender and folded the new webbing through the eyelet, using the 5 point belt harness method that's detailed in the Schroth race harness manual I routed the webbing though the 3-bars and cinched them tight.

Then installed the bolt tab onto the seat base with the correct grade 10 hardware to position the belt upwards towards the hole.

Next couple days I spent lining up the seat and finding the best height, lean and distance from the steering wheel. This part SUCKS but just take your time moving and marking and re installing until you're happy. Once the seat was in I used the discarded buckle i'd cut off the belt extender and clipped it into the OEM receiver that was still plugged into the floor harness of the car. I Then zip tied both OEM receiver with naked buckle inserted under the seat. If i had not done this and just left the buckle unplugged the SRS would not sense continuity through the buckle and 'fault' the circuit effectively turning off the airbag system. OEM wont deploy airbags unless 3 criteria are met. 1. You're over a specific weight (passenger side only) 2. the seat isn't to far forward- This is why you also have to remove the optical pick up off the OEM seat base and also zip tie it (plugged in) to the bottom of the new rail 3. It senses that a seat belt is plugged into the OEM receiver.
Now everything functions as it should as long as i remember to be wearing my seat belt when driving the car, which i do anyways.

The OEM wheel that came on the car had some damage on the left hand side leather. Unfortunately the damage was right where i rest my palm and front and center when seated in the car. This was starting to bug me. After searching around for the standard wheel and hub combos to put in the car. I decided that I didn't want to replace the wheel with a non-airbag version so I could maintain all the factory safety equipment. I decided to use an OEM steering wheel skeleton and have thickened and re wrapped in suede with the same CR black and yellow theme. I could then also swap all my SRS and cruse control stuff over to the new wheel and maintain functionality across the board. This wasn't cheap to do, but neither would be scouring the net for a new CR steering wheel. I placed my order and it showed up a week from the order. Over all i'm really happy with the way this wheel feels and looks. Its also nice to just tweak OEM parts to get them how you want other than remove and replace everything as I tend to do in other cars. After all, I want to keep this thing as much CR as possible, again that is the reason i bought this model instead of the regular ap2.

New, left vs old right. you can see the cut in the leather on the old wheel.

After driving the car around for a couple weeks before taking everything apart to do the seat and the wheel I felt that the pedals were way to far apart for proper heel toe. If I was going to take this thing on track i would want to remedy that with a pedal extension. I ordered a Sparco set that i've had on a few previous cars and waited until i had the steering wheel and seat out of the car to give myself as much room as possible to work. I drilled out the provisions and used 4 3/16 rivets to hold it in place. Pro tip: SHARP drill bits with save hassle and PITA when doing stuff like this. they are cheap and Amazon delivers, take it from me, just buy extras and use them as needed.

Since I would be on track as well as driving around town I wanted a place for my lap timer/phone and also needed a spot for my camera (dashcam and track cam). I remembered from previous s2000 ownership that Modifry made exactly what i needed and placed an order. The lap timer mount attaches to the heater control screw under the dashboard bezel. For laptime I'm using my old Q-starz color timer and for cell phone I can replace it with a magnetic mount attached to the bracket as needed. Its in the perfect place, unobtrusive while on the street and track yet easy to see out of your peripheral vision.
 |
| Lap timer pictured |
I also got the camera mount that bolts under the wind deflector and has provisions to mount either a gopro or a sj4000. After getting a dash cam that rattled like a maraca i ponied up and just got another sj4000 WiFi camera like the other one i'm using in the crx. I also bought an add-a-circuit and micro HDMI extension that i'm running off of the main fuse block cig lighter circuit to power the camera on automatically when i fire up the ignition. I ran all the wires stealthy under the carpet and door sill.
 |
| Bummer was the camera showed up RED. :[ nothing a little black vinyl cant fix. |
 |
| Starting to look the part. |
Initially I wanted to not paint anything on the car since i was going to track it, but after a few weeks driving the car around i decided that i wanted to at least fix the paint on the bumper and the trunk. I took it to Ballade for a front bumper, lip and trunk respray. I also had them check compression and preform a valve adjust.

They had the car for a couple weeks when i got the call it was all done. The compression was perfect across the board and the paint was curing. When i picked up the car i was surprised to find that they had not washed before i arrived so id be able to go over the car and agree on the work. I mean, that's pretty standard paint and body 101. I poked around the car a bit and basically decided that the paint was passable. I categorize as OK for a track car (especially the front bumper) but ill likely need to paint it again if I ever wanted it perfect or if i decided to sell the car for top dollar. For what they charge i expected a better job or at least no over spray on the headlights... Oh well live, learn and break out the clay bar myself.
After cleaning overspray and doing some touch up work and a bumper realign at home I also installed a black tow hook to the front bumper beam. They are required to get on track with Speed Ventures and double as a bit of added protection against people that decided the want to back into the fresh paint on the bumper


By now I had decided the first track day for the CR would be Mazda Raceway Laguna Seca. It was cool to have a car with stock exhaust that would easily pass the dB limit for once it'd also been quite some time since driving at MRLS due to the same stupid sound limit rule.
Now that I had a target day I started looking into anything else i may want to do on the car before i took it out. As i had always known one of the main weakness of the s2000's on track are the high brake temps destroying pads and hubs and cracking disks. The rear disk is a non vented rotor and when the car is driven hard they have have to deal with a substantial amount of heat. Once the heat builds it synchs into the rear hub, axles fluid and causes accelerated wear and the need for very costly repairs and replacements. Ironically one of the fixes for rear brake heat is to upgrade the efficiency of the FRONT. I dug out some Stoptech calipers and rotors i had on my old DC5 and came up with a parts list to fit them to the s2000. After sleeping on it for a few days i decided that i didn't want to go this direction; to do so i'd have to get different wheels to fit over the massive front calipers and it would likely change the balance of the braking set up on the car, which to me is almost perfect with the stock calipers in place.

 |
| Fronts |
 |
| billet aluminium hats with Ti floating pins |
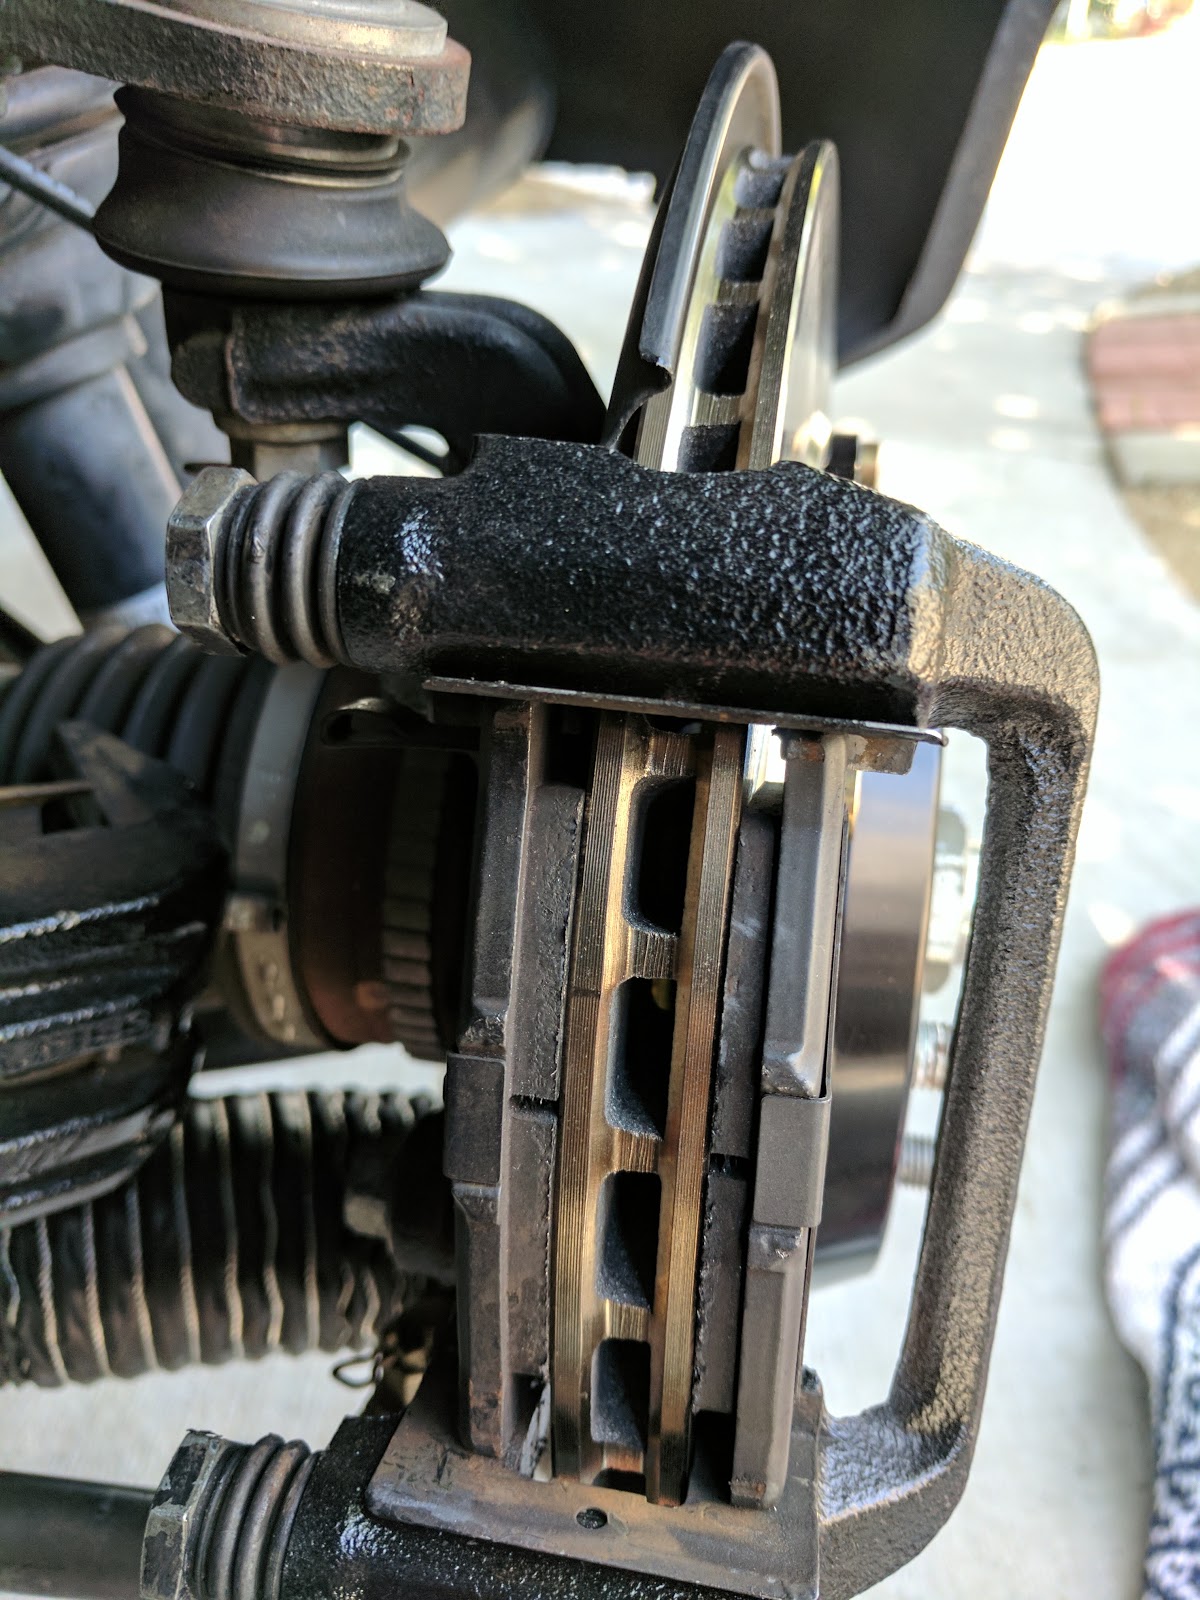
The rear Girodisk's that i ordered came with some of URGE designs machined brackets that allow the extra width of the veined rotor to squeeze inside the caliper bracket. When installing I'd need to replace my old caliper bracket with the new machined ones and shave 4mm off my new brake pads to slide over the new rotors.

As part of the brake modifications i bought some HONED s2000 air scoops, similar to the ones that i had always run on my NSX. They tube ducts which i decided against due to having to drill out the front bumper but rather a simple air scoop that clamps onto the lower A arm and directs air to the center of the hub and rotor face.

As I fit the fronts I added x2 2" holes on the dust shield. Ideally you cool the rotor by directing the air into the center of the hub, this lets the veins inside the rotor evenly cool the rotor as a whole to prevent cracking, i decided to help the air flow as much as i could get into the center by hole sawing these and bending the shield lip to close the gap between the rotor and the shield. This hopefully forces the air volume to the center, via the low pressure created by the veins evacuating large amounts fresh air.

Installed with the OEM caliper and new Porterfield pads.


For the rears, i decided that since I now had a vented rotor the same fresh air would be as helpful in keeping the temps down as it was up front. I bought 2" aluminum flanges and some high temp ducting I also built a scoop out of shop vac attachment that would pick up fresh air from under the car and deliver it to the rotor face and center. I used good t-bolt hose clamps and made sure there was enough slack for the suspension travel

using the same method as the front i bent the dust shield as close to the rotor as I could get it to seal off as much gap as i could. I shaved down the pads and installed everything.

You can see the pads ended up quite thin and uneven on my first attempt. It was really a bummer to just waste some 100 pads just to get the measurements correct.
After getting the pads to fit albeit one side was significantly thinner than the other I drove a few days through the canyons to get them to wear flat so I could take some accurate measurements.

I measured the overall thickness and marked some Project Mu Bforce pads that I got from my buddy so i could remake a rear set of pads with the same thickness on the inner and outer pad.
 |
| You can see the left are the used b-force Mu pads and the right are the poorly shaved Porterfields that are now junk |

Now the track day was right around the corner i finished up some odds and ends to make sure everything would go smoothly. I also security bolted the hardtop onto the car so it would be much more difficult for some an opportunist to steal.

My magnetic door numbers I had made showed up and were WAY to big for the car.

I had to cut the magnet down and then hand cut and placed some new numbers. Turned out pretty good for a last min thing.

I packed up the car and headed to Laguna Seca. It was a nice change to not have to worry about hooking up a trailer and driving 55mph all the way to the track.

I'd only planned to drive Sunday but once I arrived at the track on Saturday i decided to pay for a session and take advantage of the perfect 65 degrees weather condition.


The car ran great and I was only driving at about 7/10 as i shook the rust off and was getting used to the new car. Towards the 10 min mark of the session I saw a rabbit looking like he was about to dart across the track, I had just given a Porsche a point by so I was committed to my line when he took off across the track into my path. I heard a loud thump and felt the poor guy explode splattering guts all over the track. Within a lap i was getting the red dot 'meatball' flag which indicates a mechanical problem with my car. I assumed that I was getting called in for sound limit but talking to the steward i was informed that it looked like my "exhaust was dragging" I right away knew that the rabbit had likely hit one of my rear ducts and torn it free. After pulling into my pit spot and jacking up the car I could see the carnage of blood and guts around my rear axle and hair of the rabbit on the plastic that mounted the ducting to the rear brakes. Some new zip ties and Simple Green later everything was back together and as good as new.

Unfortunately my friend who was also there for the weekend crashed his 3 day old s2000 pretty hard. It spun into the tires and wrecked literally almost every panel on the car. he was fine but it was a tough pill to swallow and served as a reminder for me to go really easy on my car the next day.
 |
| bummer time |

Once the finial session was over I loaded it up and drove it the 8 hours home through stop and go traffic with out a hitch. Thats what Honda reliability is, I had almost forgotten.

After getting home from the track and giving everything a once over i decided that a wax an polish was due. I took a day off of working on the CRX and gave some love to the beat up black paint.

It really worked wonders for the hood and fenders, it actually looks very presentable now with the new paint on the bumper hood and trunk matching the rest of the car. I get lots of thumbs up on the street and its as fun to drive on the freeway as it is in the canyons. I would go out on a limb and say this is the perfect dual use car, Honda really hit the nail on the head when they set out to build the Club Racer edition.