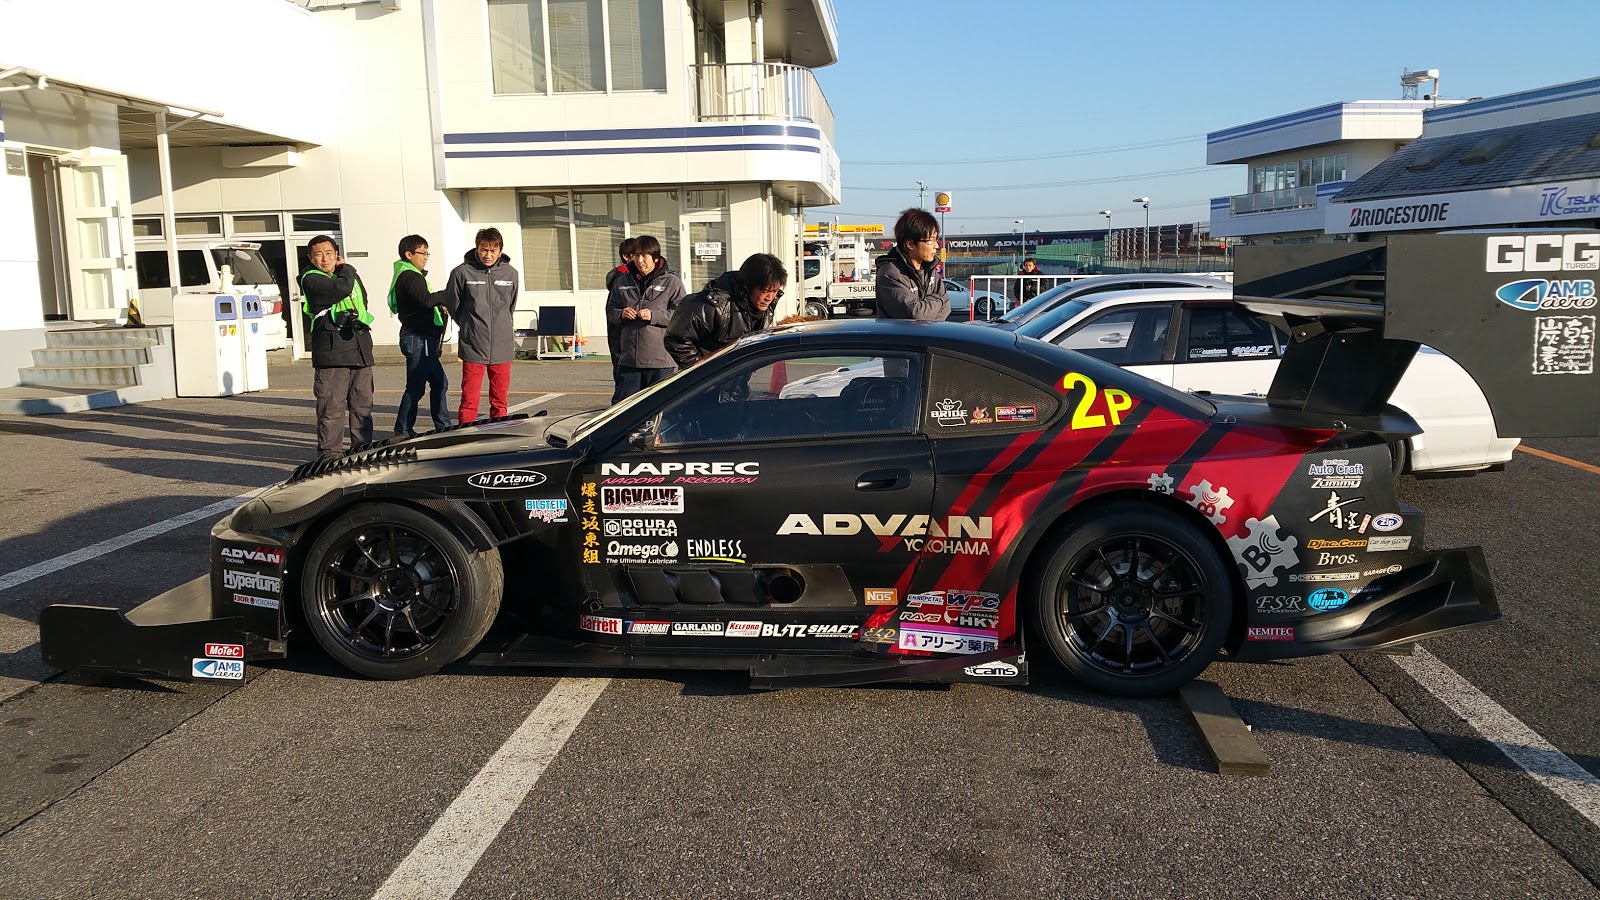
So again, as with all the entries lately it seems that I'm fairly late to the keyboard and only feel the impetus to get this stuff down because some of the details are fading. The whole inception idea for this blog was pretty simple, I wanted a reference for myself to be able go back and read specifics the why's and whens i did things. I'm super detail oriented but have found that i store the the how's and why's in the temporary storage section of my brain. I frequently purge it to make room for new data to obsess over. The big picture sticks- like a photo of the Grand Canyon, but doesn't tell the whole story of the trip. The stuff you wanna go back and remember down the road is the little things like where you stopped for gas, who you met along the way, what you had for lunch. That's all the stuff i'm trying to get down for future me. It turns out that other people like reading some of my ramble. Thats pretty cool too.
OK, chronological as possible.
When the car was out for cage work the side pillars went missing. Stuff like this is annoying but it seems to always happen. The OEM ones were looking shabby and cracked anyways so not a lot of effort went into finding them. Instead I decided that I would make another set out of carbon, simple enough and turned out looking pretty good.


Here's a panorama picture from the drivers seat. Feels a bit claustrophobic but I have a feeling it will be similar to the first time i wore a Hands device on track, awkward at first but soon I felt like i couldnt push hard without wearing one.

The fresh gleaming white paint was starting to yellow from leaning on it with my greasy overalls for a few weeks. I needed to do something about it and i remembered i'd seen these carbon tube protectors a while back, they come pre-shapped for your tube size so all you have to do is stick em on. Not a huge deal but its just one of those elements that when combined with others starts to add together to really finish.

Since I was still waiting for the transmission I decided to procrastinate on doing more wiring by going though the radiator with a micro pik and straighten out the riffles. Of course I neglected to take a proper before and after of each side, but I did manage to take a Before of the back and an After of the front. Both sides looked the same before I started and after I was finished,


When I had gutted the hood I had also pulled out all of the OEM striker and latches for the hood from the radiator support. Once all that stuff was gone it left a huge hole on the radiator support that was was planning on blocking off to help seal the air flow. After I started and was a couple hours deep into making cardboard templates I realized that it would be a whole hell of a lot easier and cleaner to just build a new support. Some carbon weave and pressed carbon drilling later I made a straight forward block off plate that I would be able to tightly seal against the radiator. Torsionally this has more strength that the flimsy metal that came off, not that that matters much here. best part is that closed cell foam makes a tight seal all the way around the ducting and forces the air to go into the radiator.

 |
| block off installed |


Another project that I was putting off was the rear diffuser. It was fine but could definitely be better. It was thrown on the car to get it finished for HFF round 3 the previous year. It'd probably made a difference in the coupe track days I had used it for but I'd always known that I wanted to do something else with the under tray.

Since I had taken some diffuser stuff off of the NSX I'd decided to try and re-purpose some of the of the Varis strakes and add attach them to a carbon sheet for the new version. After shaping and cutting all day in the heat I had the spats attached and I went ahead and built some mounting brackets.

Once it was all together and super sturdy I reattached the under belly plate that covers the fuel cell and gave it a test fit. The diffuser has a 10* rise at 38" with about 2 feet of level flat bottom before that. I was also about 8 lbs lighter than the Exige diffuser that I had replaced. The problem was I had to do all this inside the garage while the car was up in the air waiting for the transmission to be done. Because the car was immovable I could not 'step back' and evaluate the ascetics. I knew it would be functional, it was plenty strong too, but i'd have to wait until I pulled it out of the garage too see if it was something that I would be able to live with.
Another possible hang up was the possibility that I wouldn't being able to pull the car onto the trailer with it attached. If that was the case, no matter how good it looked and worked I would have to redesign. I 'd decided I wanted to build everything so there would be zero 'prep' to do when I got to the track. Pull on trailer at home, pull off trailer ready to race. There is nothing more stressful than a 7am arrival, pit set up, drivers meeting all before an 8am first session. Wrenching is much better suited for the prep week before an event. Because of this i decided to get the car on the ground first before building the tunnel runners so I could see what clearances i was dealing with.
 |
| Flat bottom. |
Looks cool from the back, kinda TI-fighter-esque


Final judgement on design would have to be done when the car was on the ground and I could stand a good 25' back and ponder.

The one thing that was kind of a bummer to build around was the exhausts back section. It goes right down the center of the car from the header then cuts a 90* right before the fuel cell and straight back out the bumper. This meant from the 90* bend back there was a tube protruding down below the flat bottom creating turbulence on half of the diffuser. I wasn't sure what i wanted to do but this would have to wait too until I could get better perspective on it and plan accordingly.
 |
| exhaust hanging in front of the flat bottom, not ideal. |
After waiting for James over at Ghostwerks to finish up some jobs he was finally able to crack open my transmission and have a look. The idea was for him to install the clutch type and Final Drive, inspect and seal it back up. I knew a couple gears were crunchy at high rev's but I just blamed that on the inaccurate cable shiftier and over eagerness on my part to get it into gear. It wasn't 100% but I new nothing was horrible either... just like every Honda transmission I ever owned.
Once James had a chance to see what we were dealing with I would decide how far I wanted to go with it.
After opening things up it was confirmed that things were 'OK'- but not great.
1-2 and 3-4 sleeve had signs of wear on the teeth

5th hub and sleeve


 |
| inner case grindings |
It turns out that whoever put the transmission together used a weird two year only (V)LSD from a civic type R or JDM SI or something. After hearing what diff i had been driving on things started to kinda made since. At the end of my sessions I felt as i rolled back on throttle the front felt like it wouldn't want to pull me out of the corner like before. It would start mid session to just feel lazy and gradually progress to feeling sloppy on corner entry too. ( i was attributing this to tires and bushings) What was probably actually happening was the viscous 'fluid' in the differential was heating up and thinning out as i pushed it. Once the fluid was hot it would lose the ability to distribute power to the wheels as evenly as when cool, this got progressively worse as the tires got heated and gummy . By the end of a 20 min session the corner grip was almost totally deteriorated to the feeling of an open diff.
Not really that bummed on this, it only means that i *should* be that much faster when I have the right things working for me.
After milling it over I'd decided that since everything was off of the car and over at Ghostwerks- now was the time to just get the transmission done right.
Ended up getting:
aftermarket 1-2 sleeve
OEM 3-4 sleeve set
OEM 5th sleeve set
3rd gear
4th gear
3-4 fork
bearing and seals
diff spacer kit
and some other odds and ends to go along with the new 4.7 final drive and clutch type LSD that i had brought over when i dropped it off.
Basically a total rebuild ... Of a YS-1 cable trans. lulz, who does that?
Now that I had the parts ordered James made quick professional work of everything. He even cleaned up the weird grinding i had on the inside of the case and put extra effort into making the beat up outside of the case look as presentable as possible.

Looks about a zillion times better than when I brought it over to him. You can see how tight the fit is in the CRX chassis by the PO wanting to grind parts of the case down for easier install and removal.

After a clean and polish of all maiting surfaces everything was back together and on its was back to my garage just in time for me to leave town for a trip to Japan.


During my trip to Japan for a much needed vacation I was able to stop at a few of my favorite tracks and some other spots along the way.
 |
| Type One/Spoon |
 |
| B18 in the build room at Type One |
 |
| New type R at the Honda welcome center |
 |
| Fuji speedway. |
 |
| Fav track. So awesome to be there |
 |
| Time attack going on a Suzuka |
 |
| Tuskuba TC2000 |
 |
| Battle Evome at TC2000 |
 |
| Under's s15 |
 |
| Orange lip DC5 |
 |
| Garage Work EG |
After I got back and had a bit of time to decompress before I jumped back into the CRX with a new enthusiasm. I was inspired by the events I attended when over seas, people seem to take this stuff to a much higher level over there. Now that I was back at home I had sense this would be the final push to getting it back on track.
I had ordered a few things before I left in the hopes that they would arrive at around the time I got back from Japan. As usual some did, some didn't. I got to work on what I could.
Before I left I'd decided to just spend the dough and ditch the last bits of rubber in the chassis once and for all. Back in another post I was saying what a bummer it was to have to buy things twice, in this case I was taking off brand new hard race arms and replacing them with spherical counterparts. As much of a bummer as it is to do i think its the right choice in the end, especially since I also decided to to order some real deal suspension..

The Koni races weren't bad, in fact I never really got to drive on them when the car was in 100% working order. I was always coping with one issue or another so I never even adjusted the dampening settings. All the same I knew that i would eventually want something else. So after some deliberation I was finally sold on a set of the JRZ RS pro dampers. JRZ's were a long time coming, I had had a dialogue with Frank at JRZ as far back as a couple years ago while discussing my options for the ae86. After speaking with him again I decided now, with as many changes as id just done to the car, would be the right time to get the same dampers I wanted for the AE project. The RS pros are a mono-tube digressive piston design- they can also be re valved to suit my specific needs if I were so inclined. Its a shock that I will never 'grow out of' and its something with local support and great quality, cant go wrong. The package for the car, top hats, shocks, helpers, springs was more money than I wanted to spend but I KNOW myself well enough to see that i would've eventually bought them anyways.

They arrived and look so good i felt it was a bit of a shame to hide them under the car. Since this was the new version with the had the hexagonal reservoirs, which as i found out look awesome but are a real bitch to mount.

Another slight bummer was the shock bodies are based off of a DC2, which means that I would again need to run a DC2 fork with the wider hole to accept shock body. As luck would have it I gave my old modified DC2 forks to a friend. He still had them sitting in a box at home and gladly brought them back over for me.
 |
| DC2 spec JRZ Shocks to CRX fork clearence was no bueno |

For the front upper camber adjustment I got some PCI spherical bushings and pushed them in the Skunk 2 camber arms. This piece fits well enough and even though I have heard about them slipping i tend to think it has something to do with the order in which you tighten the clamp nuts down. definitely something that ill keep my eye on. Once I get happy with the camber setting in the future I may even just tac-weld the adjustment slider into place.
 |
| PCI bearings |
 |
| Pressed in and reinstalled into the arm |

So off it came again and we got it back on the car another night.

Another project I wanted to sort out was the water system. I had done a small bit of service back when i bought the car, essentially I just got a new water pump and checked that i didn't have any leaks. Now that I was closer to getting the car running I was starting to think more seriously about what hoses I should replace as preventive maintenance. This got me thinking that I should just go ahead now and block off all the stuff that I didn't really 'need'.
This block was out of a GSR which means that it came with the OEM coolant bypass doughnut. This was the same part that I deleted on the F20 motor all those posts ago here in this blog. On this motor someone had already looped the coolant lines and removed the throttle body water passages but had stopped there and just left the coolant doughnut on the back of the block. Basically its just dead weight that was also causing the oil lines that I had running to/from the relocated filter to be less than ideal. If I got rid of the coolant doughnut I could also ditch about 3 rubber hoses and more securely block off unused ports that until now just had vacuum caps clamped over them.

Above you can see the set up as it was when i got the car. The broken knock sensor is a nice touch.
If I got a new water tube and I would be able to block off the threaded barbed fittings on the block (like the one i'm pointing too in the picture)

This would mean I'd have to get a few things on order to do everything right the first time. I pulled off all the stuff involved and cleaned up the parts that I would be reusing.

Above the saucer thing on the left and the oil fitting in the middle would be exchanged with a shorter threaded post that allows for the deleted donut.
Below is the part number that works for the GSR block if anyone is trying to do this themselves.

To do it right I would need to make another water pipe as below, but without the barbed provisions used to attached that rubber hose.

I bought an OEM waterpipe so it could be cleanly welded without contamination from the rusty gunk that was inside of everything when i got the car.

I handed the parts over to Art and told him what i was thinking and he got to work. Stuff like this seems pretty straight forward to someone but its surprising how much effort has to go onto machining, prepping and welding something as 'simple' as this
Art turned down the fitting in a lathe and notched it to fit on the tube itself.

Once the parts were made the pipe was cleaned and polished to ensure a water tight weld could be done

AN fitting welded on tight and extraneous barb fitting blocked off in the background. This water pipe is now ready for space travel.

The threaded barbed fitting that was on the other side of the rubber tube in the block needed to be blocked off too. Anything that goes into the block is a HUGE pain in the ass. Honda uses a mixture of British tapered threading a couple NPT threads in some awkward sizes that are not easy to find. While I was on the hunt to buy the correct block offs Art said he could take a crack at just cutting and plugging the barbed fittings id taken off. Again, machining and patience was involved

Art was able to plug the engine block water provision using nut heads from the bolts pictured.

Thats a dime size crush washer for reference. Art is a damn metal wizard.

Once I got the pipe and block offs back I gave it a quick enamel coat for protection.

I cleaned up and reinstalled the oil block plate so I could test fit the hose lengths again. Since I'd gotten rid of a 2 inch think plate so I knew I would likely want to re cut hose lengths.

Now that the fittings were re positioned farther inward i was able to simplify the path that the hoses ran. As I was mock fitting everything I marked everything whee I wanted to apply an anti chafing soft sleeve to anything part that had a remote possibility of touching another hose.

This one for example passed really close to the main alternator power wire.

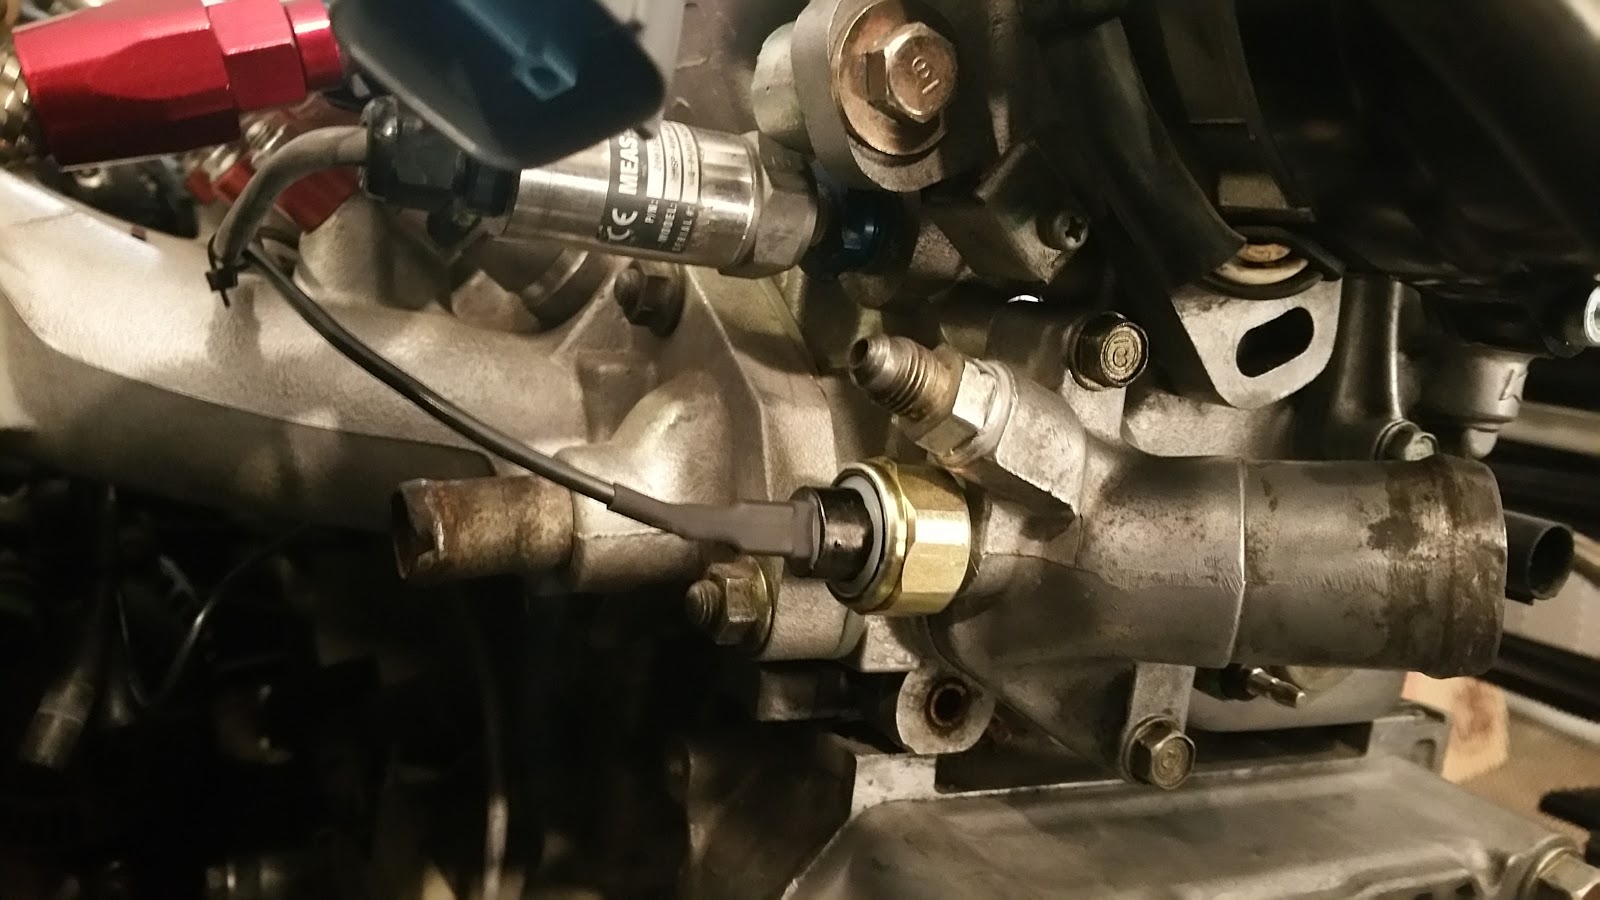
While all that was going on I decided i'd also finalize the water pressure switch light. The gold block under the AN nipple measures the water pressure coming out of the radiator, when the system heats up to temp and builds pressure the switch self grounds and extinguishes the light in the dash.
Now that all that was taken care of I would only need a single rubber hose from the head to the block. The whole system is much more streamlined with much less potential for failure.

Next I wanted to tackle the sunroof plug that came on the car when I got it. It was ok but leaked a bit and had a huge thick ridge right at the crown of the roof where it would catch the wind that was coming over off the windshield. I bought a sheet of carbon large enough to to build another plug, but with some extra just in case.

It was a long and boring process but essential to do correctly if you're trying to get a nice result.

Water sealed the gaps evenly for a factory look.

Looks pretty cool, definitely much better than what was on the car before and much lighter too. I toyed with the idea of doing a full carbon skinned roof but at the moment i feel like I would have to go back and undo to much stuff to make it happen, perhaps some time in the future.

I found a set of Spoon twin-block calipers for a reasonable price in brand new condition. After finding out that they accepted the stock ITR/NSX pad footprint and only weighted just over 5lbs each instead of the 12+lbs for a single of the integra type R caliper, I was sold. Pedal feel should be improved too from the 4 pistons instead of only the one. I'm hoping to reduce the unsprung mass on the wheel low enough so that I can get away with a higher spring rate in the front instead of a swaybar. This all depends on quite a few things but in the end lighter is always better.

Spoon calipers fitting over the Mini cooper rotors.

The last pieces of rubber in the car were the rear trailing arm bushings, not long ago I'd replaced these with some Hardrace bushings as well. Now that I had gone with solid arms everywhere else these would be the weak link in the system if I left them. When ordering and initially pressing in the rubber bushings i realized that trailing arms that came in the car were off of a Integra DA. This meant that they were a stand out from Honda in they were the only RTA that had the larger diameter rear bushings. Now that I had choosen to get the spherical bushings I would need to either build a shim to interference fit them in the larger rear trailing arm hole that I had, or just go and get DC2 or EG rear trailing arms.

At this same time I was toying around with the idea of running a 9" wide wheel on all 4 corners of the car instead of the staggered set up of 9" front 8" rear. I decided to use the opportunity of having everything apart too see how feasible this would be.
After pulling the DA arms off the car I re assembled the hub so I could mount the wheel and get a good idea of the clearances with a 9" wide wheel on the rear.
They would fit as long as I grinded some metal down to clear the upper arm.

clearance below had about 1/3 of an inch

I put that data aside and went and bought a set of Civic eg rear trailing arms from the junk yard. I only needed the stamped metal part but they insisted they sell it as a unit.


With the EG arms installed I would have to grind significantly more material out of the upper camber arm bracket to get clearance.

I'd also have to maybe run a lower offset or a spacer for the same wheel to no contact the arm face on the back of the wheel. So, Yes, CONFIRMED Acura DA arms have a slightly wider track, hence more inner wheel clearance.

Also I started to think how hard it would be to warm up a 9"wide rear wheel in a car with zero weight over the axles. I made my decision to stick with the staggered 9"front 8" rear set up and just use the EG rear trailing arms.
Now that I had a plan, first thing was first- I decided to clean up the junkyard arms before putting them on the car. I disassembled everything again and wire wheeled all the gunk off them in prep for fresh paint.

This was all a ton of hard work to do for something that will never been seen by anyone but me. I couldn't imagine putting my new JRZ's onto something that looked like it was pulled off of the sea floor.
Both sides painted and dry, ready for bushing and hub install.


PCI bronze bushings pressed in easily and locked into place with a eared backing plate. Bushings themselves are sealed and serviceable and should last for quite some time to come.


'New' hubs installed. While I was there I replaced the 4 torx bolts that hold the hub on with some grade 10 steel oxide hex bolts loc tighted into place.


A close up of the pass through, I used a carbon sheet riveted into place and silicone filled the back portion to make a water tight seal. this one was still drying, excess silicone was cleaned up as it partially set and still tacky.

Finally mounted my hand held extinguisher and quick disconnect in the empty space by the battery. Its always good to have one on hand around the pits or on track if you are the closest person to a bad situation.

Now that I had the car back on the on the ground I bled the brakes and check and re check all the fuel lines for leaks. You can see the canisters for the front shocks mounted right behind the headlight block offs. I thought i had better pictures of this but i guess not.

Now that I knew the size wheels I wanted to run i decided to get some replacements for the heavy Gramlight 57DR's that were on the rear. I replaced them with a pair or RPf1 15x8 +26 enkeis. I really love these wheels. There nothing super exotic or special about them looks-wise, but they are super light and super strong. I guess by being such a 'work horse' the RPf1 has earned its place as one of my favs- especially in the 15" size. Very f1-esque.

+26 offset is perfect on the rear of my car

So after checking and re checking and filling fluids the moment of truth came. Time to fire up the car.
Crank crank crank SUCESSS!

IT RUNS!


Pulled it out of the garage and let everything idle up to temperature. We wrenched down some fittings, adjusted some stuff; overall everything looked really good and the car sounded just like I remembered it. Now it was time to go get it aligned and tuned. I had scheduled the appointments a day apart at the end of the next week. Alignment on Friday tune on Saturday. I still had a few days to break in the diff and prepare to bring the car down. I was excited.
After annoying my neighbors by doing figure 8's in the street for 25 min I drained the transmission break in fluid and filled it with some Torco RTF and friction modifier. The diff already felt MUCH different than the old one though I never went over 10 mph or above about 1500rpm so I have yet to feel how much about the car had changed.

While I was under the car again and had a few days I decided to do some preventative maintenance and strip and rust bust where the cage pads had been welded into the car. I wire wheeled the sound tar off bottom surface and applied some rust goop. After letting it sit I cleaned it and reapplied undercarriage spray.

 |
| mid progress, shaky camera because this stuff smells and burns like hell if you get it on your skin. |
After that I decided that I would move a fire nozzle to inside the fuel pump/filter box. You can see the red nozzle in the center of the two fuel lines here.


Alignment and corner balance took some time to get right, as is typical with a car that just had EVERY thing changed. Chris and Darren were pretty stoked with how far the car had come from the last time i had it over there for some work. Back then it was almost stock with a few bits bolted on, seeing it in this context i understand how far its really come in a relatively short time.


When pulling it off of the trailer we noticed that it had a white frothy substance coming out of the tail pipe. I assumed it was condensation from the cold air by the beach and having driving the car for the first time the night before. Now that it was on the dyno and Shawn started mapping out the fuel curves it became apparent that the 'condensation' was not getting any better, rather worse.


After some investigation we determined that I had a stuck open fuel injector that was just dumping unburnt fuel into the cyl's and back out of the tail pipe. A few quick calls around we got lucky and were able to head a few blocks away and pick up an OEM replacement. We literally got there just in time as the guy was walking out of the door with his backpack on to go home. He said if he had something in a drawer right in the front office we could buy it, otherwise we would be out of luck since he wasn't going to go back into the yard and pull one out of a car for us. As total luck would have it the first one he pulled out was what I needed. I gave him a 20 and we headed back to Church to try and finish the tune.
 |
| Arman flexing as dude is literally closing the gate, we were just in time. |
Back at the dyno we swapped out the offending injector and had Sean give it another go. He got some idle time and a pass under load when I notice the tail pipe was smoking and spitting again. More investigation determined that we had clogged ANOTHER injector. WTF. The chances of these two going bad one after another was very unlikely. There was clearly some sort of contamination inside the lines post tank filter. I never even thought of installing another filter pre-rail as there never was one before, but what was happening started to make sense. Who knows what kinda gunk was in the hard lines that was getting loosened with the first exposure to gas. Also this was the first time the car was taken over 1500rpm so the increased volume through the lines was likely dislodging stuff that was stuck in place at lower pressures.
I decided to call it a day. I knew the oil was already contaminated with fuel and i had a real potential to damage the engine block if we kept revving it. Sean agreed and said that he was already out of injector bandwidth anyways. He'd maxxed them out at 100% duty cycle and we hadn't even advanced the timing and adjusted the cams yet. I would need to figure out how to filter the fuel before it went into the rail and also replace all the injectors with something that had more capacity.
We agreed that id come back when it was all sorted out and we would put the finishing touches on the tune then.
Initial pass made 205hp and 138tq. not bad.
That weekend Nate and Dan came up (both Acura techs) and I explained what I was thinking could be the problems. We all agreed that really the only way to tell what was going on would be to do a leak-down then compression test. Once we had the information i could react accordingly.
First we did a compression test 240-240-160-240. cyl 3 was low but still within spec of a 'good motor' Next up we did a leak down test where we pressurized the cyl's to see how they managed to hold. Again, cyl 3 was worse than the rest and we could hear hissing out of the exhaust which indicated that it was likely the valve seats on the exhaust side leaking. I knew that the valve guides were already causing smoking on deceleration, which is a common problem on the b-series Honda motors. After talking it over it was obvious that the best bet would be to get at least a valve job and fix the guides.
With 4 guys working on it we literally had the head off of the car inside of 15min. The block's surface looked good and we didn't see any evidence of a head gasket leak contributing to the low numbers.
Also turns out that the block has had CTR pistons in it the whole time, which is nice to know since i could have easily damaged the head if we started advancing the timing too far the day before on the dyno. Cyl walls looked great though.

 |
| Just look at these clowns. |
Within a few days I had droped the head down to PortFlow on the recommendation of some very knowledgeable people. This was another unexpected big expense but also another case of "well i've gone this far, may as well.."
In the meanwhile I clean and prepped the block surfaces and Arman ordered some 370cc RC injectors and all the OEM parts and gaskets id need to put everything back together when the head showed up.

After seeing the diffuser from all angles and giving it time to grow on me, I realized that i wasn't too stoked on it. Like I was saying before it would be functional but i had room for improvement in the looks department. Also one of the major problems i touched on earlier was that the exhaust routing requires a less than ideal set up. Looking at it again I decided that I wouldn't be missing anything by chopping the back half of the exhaust off. From the 90* at the fuel cell back it was basically only straight pipe. What else was and it would need to be clocked just so as not to clank and rattle against the sway bar. Art and I came up with a plan to build a turn down just after the muffler. This kills two birds. 1; for tracks where i don't care about sound I can maximize efficiency on the diffuser by having a clear flow onto it. 2: know I would eventually build a extra quite 92dB Laguna Seca spec exhaust,;by chopping it here I can use the same B pipe that I currently have on the car and only need to disconnect the V-band to eventually swap between the two.
 |
| Making the cut, jazz hands |

Shortly after I got a call that the head was done and ready to get back on the car.
specs:
Portflow head porting job with install of Guides & 5 angle valve job
Supertech Inconel valve set standard size (set of 16)
Supertech valve spring set SPR-H1000dr (set of 16)
4130 Chromoly retainer set (set of 16)
Supertech valve seal set (set of 16)
Supertech valve guide set (set of 16)


Very pretty.
Arman and I made an afternoons work out of getting the head back on the car with the timing and valve lash set.
I preparation I had taken a few nights to clean up all the sensors, throttle body and and replace all the gaskets in the intake manifold.

You can see some preventive repair work Port Flow had done on the corner inside of the head.

As far as the fuel filter problem I decided on going with a Radium filter. As always, they deliver top notch quality engineering and looks, I decided on the 10 micron filter with the largest filter surface area i could get (picked up spare filter elements too)- When it arrived it was slightly bigger than i was planning so I supported the weight it into the throttle body just to be safe. You can see the stainless braided line that goes to the fire wall still allows flex as the motor rocks.

You can also see the RC injector peeking into the picture. I was able to get the size I needed with an OEM obd1 clip so I wouldn't have to run a harness jumper or anything ghetto.

The discovery of the CTR pistons also prompted me to look into getting a colder plug type to help with potential pre-detonations from hot spots on the piston peaks. I opted to go with a 7 instead of a 9, so a few notches lower on the scale.

I also chopped the valve cover to allow for easier adjustment once we go back to church to finalize the tune.

I drained all of the fresh oil that i'd only just added because of the potential fuel contamination risk, not cheap, but not worth the risk in the end. Also more of a bummer because its not as easy as just draining the pan in this car, quite a bit of stuff has to come off so I could properly flush out the lines and cooler of the old oil.
I took the opportunity to re order a new Wix for the oil relocation block. when it showed up from Amazon it was comically sized- there was noway it would fit into the space it needed too.

Instead just getting another replacement Napa filter I decided that I would get a reusable element that the relocation block was made for. I contacted System-1 and was able to get the correctly sized screen and volume for my oil type and system. Its still a big filter but by not going overkill I maintain a stronger oil pressure in the lines and cooler. This filter is metal and screws apart so the element can be cleaned with soap and water when you do an oil change. This seems like a much more environmentally responsible solution to have on a car that will require pretty frequent oil changes.

I also decided to try this Penngrade race engine oil. I had a discussion and read enough to be convinced that my cam ramping would require an oil with a higher Moly or Zinc content oil to run without wear. Brad Penn stuff is extremely highly recommended online and has something like 23million more PPM of Zinc than is currently allowed by the EPA in conventionally available oils. If you're interested- I suggest people read up on how the oil you get now - and have been using for years is not even really close to the oil used to be 10 or even 5 years ago.

Now that everything was back together (again) I fired it all up and ran it up to temperature. It was immediately apparent that it idled MUCH smoother and tighter. Doing another compression test the numbers came back 280-280-240-280. Much better.and good to get confirmation that the head work did the job. Cyl 3 is still lower but well well with in the 10% deviation.

As i mentioned in a previous post I'd been deciding what tire to use on the car. For HFF I know that I would want to run the standard Nt01, this is the same tire I have had on the car for a while and keeps me below the Unlimited class points cap. Aside from HFF I have really wanted to try a more grippy tire. I'd bought a full set of the Toyo RR's a while back and only used them for half a session. They have a tread wear of 60 and are supposed to be a tad quicker but also more finicky to heat loads and car set up.
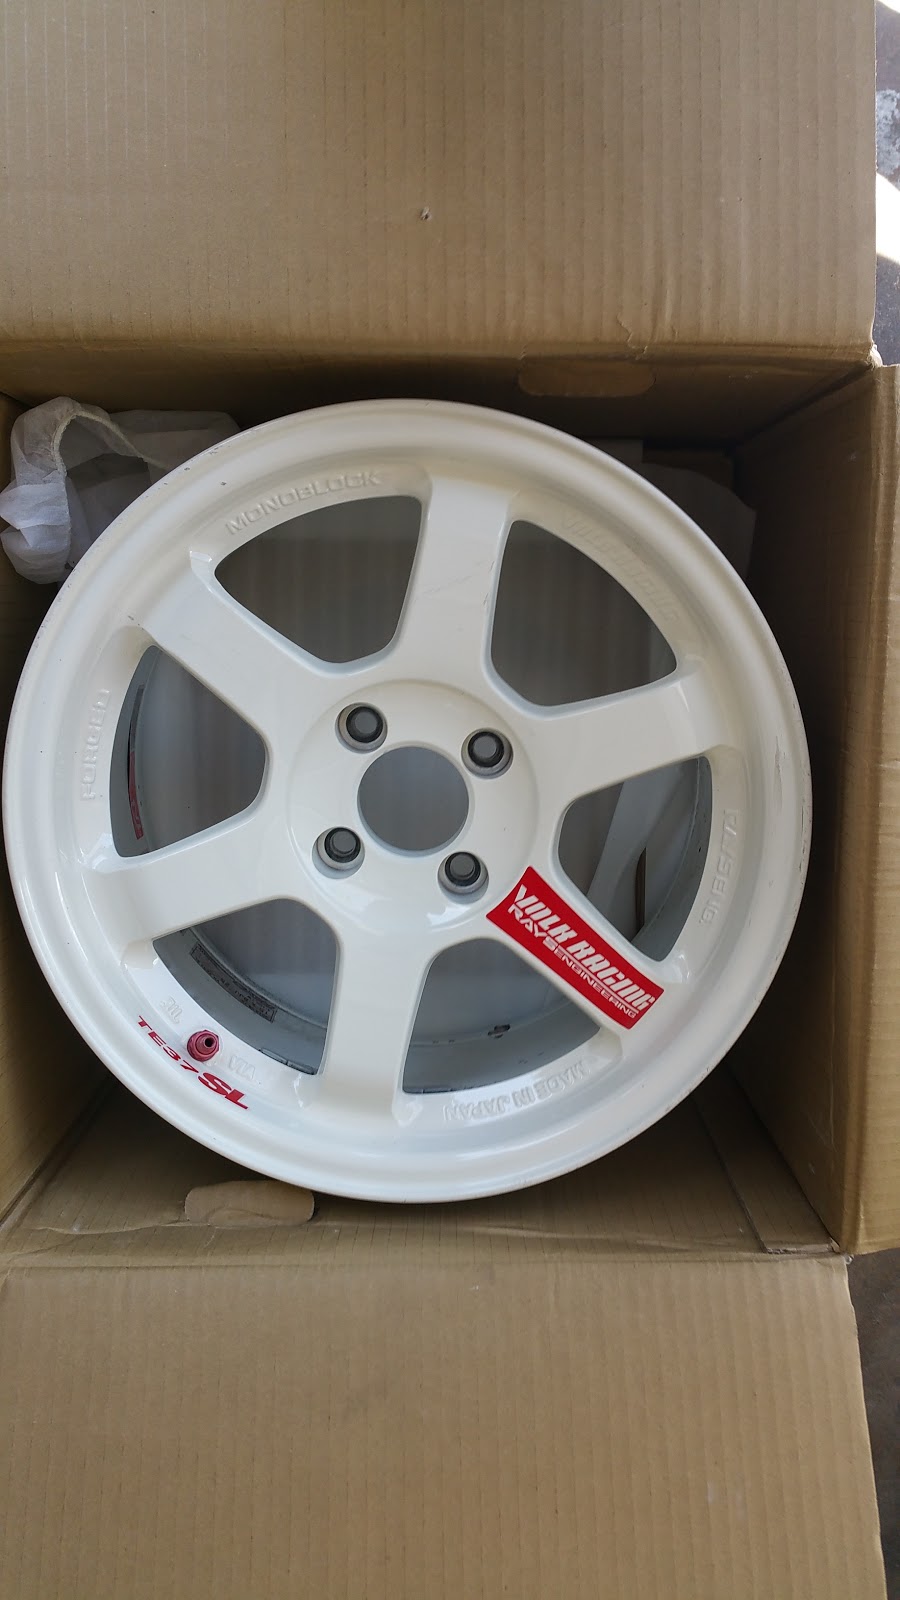
To be able to have both sets of tires on hand at the track I needed another set of wheels to put them on. I bought another pair of 15x9 6ul for the front and was also able to find a pair of TE37 SuperLaps in white 15x8 +26.
I mounted the Toyos on the wheels and put them on the car so I could get a look.
YES. That looks awesome.


Now that I knew the car could be loaded on the trailer with full aero I decided to re-work some the front bits. Originally i'd had the front carbon spats attached to the splitter and it mounted all as on piece. Now that I didn't have to worry about assembling the car quickly in the morning of an event I decided to revise the design so that I could more easily store it and move it around the garage. I bracketed the spats to the bumper and fender respectively so the bumper could still be taken off quickly. Still on the list is to decide how I want to remount the front fences off of the splitter. I think i'm going to wait until I consult with the firm I have in mind to build the car's underbody.


Before getting back on the dyno for the tune I decided to trim the valve cover for easier access to the cam gears.
 |
| Mid progress before a lot of work with a metal file. |
 |
| All filed smooth, painted and re installed |
You can see the fuel rail in the picture above. After a through cleaning I also refinished the horrid faded pink to a more subtle black.
When assembling the car aero I realized that the jacking arm I had made over at SMP would not clear the side skirts when they were installed on the car. I took measurements and Art whipped up some new longer ones. A coat of red safety paint on the corners are so I don't accidentally open the door while their installed.

I also hard mounted a piece of carbon and installed a low draw hi-accuracy LED digital Volt meter. This is so that i'd be able to monitor the battery voltage before start-up and during loads. This will also help inform me if the 'ninja switch' i built is engaged and there is more battery draw than whats coming in. Its also good as a diagnostics tool track side if you don't happen to have remembered to bring your volt meter.


Another job i had been procrastinating on was to hard wire camera power. I had left provisions in the +12v switched source and finally got around to ordering the correct 12V to digital DC 5v converter box and cord. I Deutsche pinned the power leads and connected it to the provisions I'd left open. Now, if the power to the distributor is 'on' the camera will automatically start recording in full 1080P HD. For now I have it facing inward to the cabin where it will keep an eye on everything I cant see from the drivers seat. I may eventually move it or multiply the signal and get another but for now here's where it lives.


Gunna end this here. I have a lot more to go over but I tend to make these a LOT longer than they need to be. The last major hurdle will be the re-tune this coming Saturday then a track day for HFF rd.2 shortly after. I'm going to try and make it out to the track at some point before then and just drive the car around and hopefully shake out some bugs, I know there will be at least a few.
Until then!