Alright, So I'm REALLY over due on writing one of these. These been a ton of stuff happening since the last one as far as work, travel and cars and I frankly just haven't felt like sitting down for a few hours and getting one out. I'm gunna write the next few as chapters until i catch up. I'll focus on one thing or another, this'll make it easier for me to remember details on things that are important for me to get down correctly for future reference.
Since the last post of getting the brakes and fuel filtering sorted (again) on the CRX. I had taken it out to Willow for another test day in preparation for the upcoming HFF RD 5 mid-season event at Buttonwillow CW13. Everything felt like it was on the up and up and all i had left was a short list of mostly cosmetic stuff to do. I was pretty much was just poking around at this point.
That's when I decided to take stock of the parts that I had been collecting for the past year or so for the NSX. My intention was to 'tone it down' a bit so I would be able to enjoy it more on the weekends or a normal night that I just felt like wanting to rip around the streets. As it had been built, the focus had been primarily on track safety and speed. The harnesses, GT wing, seats and exhaust that were great on track but made it extremely difficult to get around anywhere in LA that wasn't perfectly flat or planned out. It was also a pain to get in and out of and talking was a no-go while the car was over 2500 RPMs. To add to everything it was also due for a brake flush, water flush, oil change as well as re working some gauge functionality i had put off when swapping the new motor in.
I figured that now with a few weeks until the BW mid-season in the CRX, and a vacation to Japan right after, that now would be a good a time as ever to at least start to tackle my plans. The situation was less than ideal since the CRX was occupying the garage and the majority of work would have to be done in my driveway. Ah-- to be 16 years old again...


The first thing was first and I wanted to start on the most complicated part to give myself the most time to have it finished before I left. The most complicated part was also the part with the most unknowns, I had a list of stuff that I would just need to figure out 'when i got there' and I know projects like this always takes longer and cost more than you think.
An air-lift would gain me up to 3 of clearance on the front with the push of a button allowing me to get in and out of driveways or over pot holes in the LA streets. When the cups are not pressurized a 'metal to metal' contact in the strut hats allows for undiminished performance of the shocks. Sold.
The first step was to choose the air lift system. I'd had been thinking about for quite some time and started really looking into these with some intensity for a few years. Now that I was getting serious about it I chatted with a buddy of mine, Regan, who told me all about hit fitting the same type of system to his car.
Being ready to pull the trigger on something I really started to pick his brain. I had become a believer in their viability about two year prior after witnessing Regan frequently track his car on a kit of his own design. There are a few 'off the shelf' for this type of thing but they are either super B-grade or very expensive. Now that i was actually looking to get something myself I was fortunate enough for Regan to offer up of the very same metal cups that he had left over from his first run of machining and R&D on a kit he'd spec'd and designed. This was a HUGE hook up that i was very, very grateful for.

Now that i had a parts list and the cups I would need to modify it all to fit the specifics of how I wanted mine set up. Basically its a mixture of Crossword, Shoots and Ladders mixed with a brain puzzle. "i need this the and this to connect and talk to this then get this signal/air/power over here to do this.. but I have to do it in a confine space that's shaped like this" Its a weird thing to say but I LOVE figuring stuff like this out.
 |
| Figuring out configurations. Battery, Accumulation tank, pump |
 |
| Easy up, saving lives. |
I had devised a simple method and built in a pressure gauge off of my compressor with a compression lug hooked to Jake Brake line on one end, then a coil over with spring on the other. The coil spring would act like a weight trying to force the air out of the cup and I would simply determine the time it took each coil to drop from X to Y pressures under the same circumstances

After some time it became clear which two that I would want to be using..

Now that I had chosen the two best cups, I dropped my spring rates down from track specific Swift spring 12/14kg rates that I was using with my R-compounds back to the KW's softer 348lb rates. These would match better with a sports tire along the lines of the Michelin PS3's

Now, fast forward a TON of smaller steps..
By now I had figured routing and power and how to make the harnesses look OEM but as serviceable as possible. I had taken it a step farther and built into the system a main battery kill switch too. I had grown tired of digging around under the air scoop with a 10mm wrench to undo the old stretched out battery cable clamp. Now everything was routed through this switch and could easily be shut down with no tools and very little effort.
By now I had figured routing and power and how to make the harnesses look OEM but as serviceable as possible. I had taken it a step farther and built into the system a main battery kill switch too. I had grown tired of digging around under the air scoop with a 10mm wrench to undo the old stretched out battery cable clamp. Now everything was routed through this switch and could easily be shut down with no tools and very little effort.

I while back I removed the ABS, frankly, the ABS on the NSX SUCKS and I'd mounted the replacement proportion valves (or to be more accurate 'stand-in blocks') on the drivers side frame rail. Now after wiggling everything around over and over while refining layout I realized that one of the oem steel lines had developed a pinhole leak just under the nut end and would need to be repaired. Fortunately, replacing this line allowed me to move the hard lines back farther away from the actuators and opened up enough room to make everything work.

Shitty picture, deal with it.

During this whole phase I had to constantly test fit my radiator hood scoop for clearance with the new components. Not only does the scoop help with cooling and functional downforce but would also create a heat barrier separating the hot air coming off of the radiator and everything else in the bay. The actuators and compressor unit life drop significantly when constantly exposed to hot air. Also, heating compressed air does weird things to its density and would cause the pump to have to run longer and more frequently. Setting this whole thing up to be as compact as possible allowing my to still utilize the scoop was paramount in the decision to add this to the car.

Now, moving to the cabin side, I routed everything through and OEM push-through gasket as a single harness. I had long ago deleted the radio plate console and along with it the OEM cig lighter. I'd made due without a 12v power source for charging my phone or go pro for years but now that I would be able to take this car on longer trips I decided to add a hidden 12v plug unit inside the glove box.
You can see in the picture below missing slots for different ECU components I had removed from the car when it was a dedicated track machine. I still have every part I've ever taken off of this car, ill maybe add them back in one day. Maybe.
You can see in the picture below missing slots for different ECU components I had removed from the car when it was a dedicated track machine. I still have every part I've ever taken off of this car, ill maybe add them back in one day. Maybe.

 |
| hidden 12v marine socket. |
 |
Everything is separated through this connector so it can be divided into 'cabin' or 'bayside' plans. Per usual I drew up wiring schematics for everything for future reference. The controls of the system were as simple as I could make them. Smaller switch controls power to the automatic pressure switch on the tank. The compressor will kick on automatically under a specific pressure and then atomically stop when the tank is deemed 'full' I can leave this switch 'On' and let it sort out when it wants to refill the tank to keep it ready for use. But on longer drives where I wouldnt be needing constant pressure I wanted the option to override this logic and put it to sleep. This is also useful for parking the car for extended periods while the battery is still engaged. Its plausible that the sealed system could develop a leak and constantly be kicking over again and again while your not around.. eventually killing the battery. I could either kill this switch to prevent that, or power down the main battery breaker I installed in the bay. The big rocker switch is simply an Up/Down where as the tiny amber LED lets me know when the pump is getting power, even if its running or not. I put this in as a trouble shooting feature so I could potential diagnose a faulty or overheated compressor.  |
Final install of the up and down actuators all plumbed up.

Below is everything installed- it doesn't look like much changed but almost everything in the front bay had either been moved, rerouted and adjusted.

When kicked over from cold the tank takes about 15-20 seconds to fill completely (depending on ambient temps) it can lift to its full height in less than 2 seconds. Compressor sound is louder than id thought it would be, but its not too-too bad. I'm going too keep my eye out for a quieter one eventually. Functionality for now was the main concern- and this one works GREAT.
All in all the whole system excluding the top hats weighs 18.9 lbs, since I have a smaller Odyssey battery I'm already in deficit weight over the stock 40+ lbs battery and OEM spare tire with brackets. This also isn't taking into account that I'd previously removed the ABS and it's cast iron mounting apparatus. All in, even with the addition to of the tank and compressor, I'm still much lighter than the stock set up.
 |
| lower setting |
 |
| "raised" setting |
Now that everything was working I pulled out the replacement lower bumper lip I planned to install. The old one had seen some shit. it was cracked and repaired about 15 times from track offs and trailer loading. I decided I wanted to swap back to this older style 'version one' lip anyways as i like the look better and wouldn't need to worry about its compatibility with a splitter. In fact i took the NSX splitter and carefully trimmed it so that it fit perfectly inside the new lip then attached it to the bumper. Sealing off the front end helps with cooling by removing air spill into the front compartment, it also creates a more stable front end while helping the diffuser at the rear work better.

I mounted it to the bumper and sealed off all the holes


Meanwhile I had also ordered some 4"x4" and 3"x3" aluminum beams to replace the steel beams that originally came on the car as part of the crash structure. I had long since ditched them for lightness at track days since they weighed like 35+lbs a piece. I had been driving around without anything for a few years now, which is fine while on track but I realized that if any idiot on the road tapped my car at a stoplight it would likely mean frame damage. What would be worse is insurance would look for any reason to not payout a claim... and removing part of the crash structure is a pretty damn good one.

The 95+ cars came with aluminum beams to replace the steel ones of the earlier years, so after installing these id be right back up to DOT spec- even down to their thickness. This was all special order from my metal supplier, which required a bit of a wait while they found exactly what i was looking for.

In preparation for the install I removed the frame mounted splitter bracket that you can see in a picture earlier up in this blog post. I had built it a while back and must admit it was bitter sweet pulling off parts that took a time and effort to engineer and create. On the flip side, i was happy that they did their job and never gave me any problems. They went into retirement honorably discharged.

You can see I also replaced the OEM Styrofoam structure. I mean it when i say "i kept absolutely EVERYTHING I'd ever taken off the car."

a shitty picture again, but everything is sealed tight all the way back to the flat bottom i even included air fences back to the battery tray cover.
After removing the alumalite runners from the side skirts I felt like it needed something back there to keep the car looking aggressive like before. After searching I found these long carbon runners that id reinstall under the side skirts to gain back that subtle something i felt was now missing.

I also added carbon spats to cover the wheel cross sections. I just love stuff like this. you can see the carbon runners installed on the side skirts here. LOTS of measuring and cutting required to do things like this cleanly. Everything had to be measured to be the exactly same width as the type R air scoops that sit on the side of the car, doing so made it all feel cohesive.

I also acquired and painted a sub wing for the deck lid, I'd always felt like the type R wing alone just needs a little something extra to look complete.

Now a big job that i didn't document was the replacement of the shitty window regulators with a newer upgraded part that allows the windows to roll up and down at a normal, smooth, pace. The crap that they put in there at the factory cracks and makes windows hang up and operate inconsistently. This was a long weekend of noodling alignments and silicone grease- it SUCKED but its done and I never have to do it again.
I also FINALLY replaced the shitty stupid CraftSquare aero side mirrors with OEM ones that I had painted black. Again, this was something id been meaning to do for a while and I'm so glad i finally got around to. The OEM ones are actually stable, which makes them usable at speed; instead of just shaking vibrating colors reflecting off the carbon ones. These ones are electronic too, so I can angle them down from the drivers seat when I need to back up down my driveway. Imagine that.

Meanwhile, I removed a bunch of interior from the car that I'd decided no longer met the 'streetable' direction i was taking it. I knew that I was going to pull the race seats and harnesses out but I was still trying to figure what I'd want to replace them with.

 |
| removed racing stuffs. |
After some time I sort of had an Epiphany when in Japan, after seeing cool street car after cool street car I decided that the OEM seat were really the best option. The ones that had come with my car weren't the best to begin with and had since literally sitting under wheels, tires and car parts in different storage units and garages for years, they were even worse than when i got them. Like I said they were really, really beat up- but were still all there. After digging them out and a weekend of careful disassembling and inspection I'd determined that all the motors and moving parts were still in good working order so I went ahead and dropped them off at the upholstery shop.
It took MUCH longer than quoted but after some back and fourth I showed up and picked up my brand new alcantera covered OEM seats. I have to admit, they turned out better than I'd anticipated, but also cost me about double what I was hoping to pay. I had the Drivers seat specially sculpted deeper into the frame so my tall lanky ass to sit comfortably in the car with a helmet on (if I still wanted)


I installed then back in the car with new grade 10.8 hardware and also put back in the 3 pt belts. It was really starting to feel like I car i could use daily if I really wanted to again.


I left the ZD gauge cluster in the car and the water pressure warning light. I contemplated removing these but I really like the functionality and I also want to maintain some of the rough edges from its time as my primary my track car.


Now that that stuff was done the last piece of the puzzle was to swap the exhaust for something more streetable. While I was there i added the same style aluminum bumper beam i did on the front to the rear. It was MUCH much easier to do all this together since just about everything on the rear had to come apart anyways. The mounting was a bit more tricky to get lined up here due to the curve of the bumper and the way it mounts to the chassis. I would also need to move the rear tow hook and create a threaded pedestal for the liscense plate to bolt into instead of the zip ties that had held it in place for years and years.
 |
| measure measure measure cut/drill. |
 |
| Comptech header ceramic is starting too look beat, but still good enough to leave for a few more years. |
Below is a test fit to get the heights and alignment right. The bumper needs to slide between the tail lights and tall mounts, if there isn't enough space and you try and force something, you'll easily crack a tail light... and those are as cheap as you imagine they are. Once the bar was finished and heights marked the new beam was painted black with semi-gloss enamel to make sure it blended in behind the holes i had cut in my bumper cover.

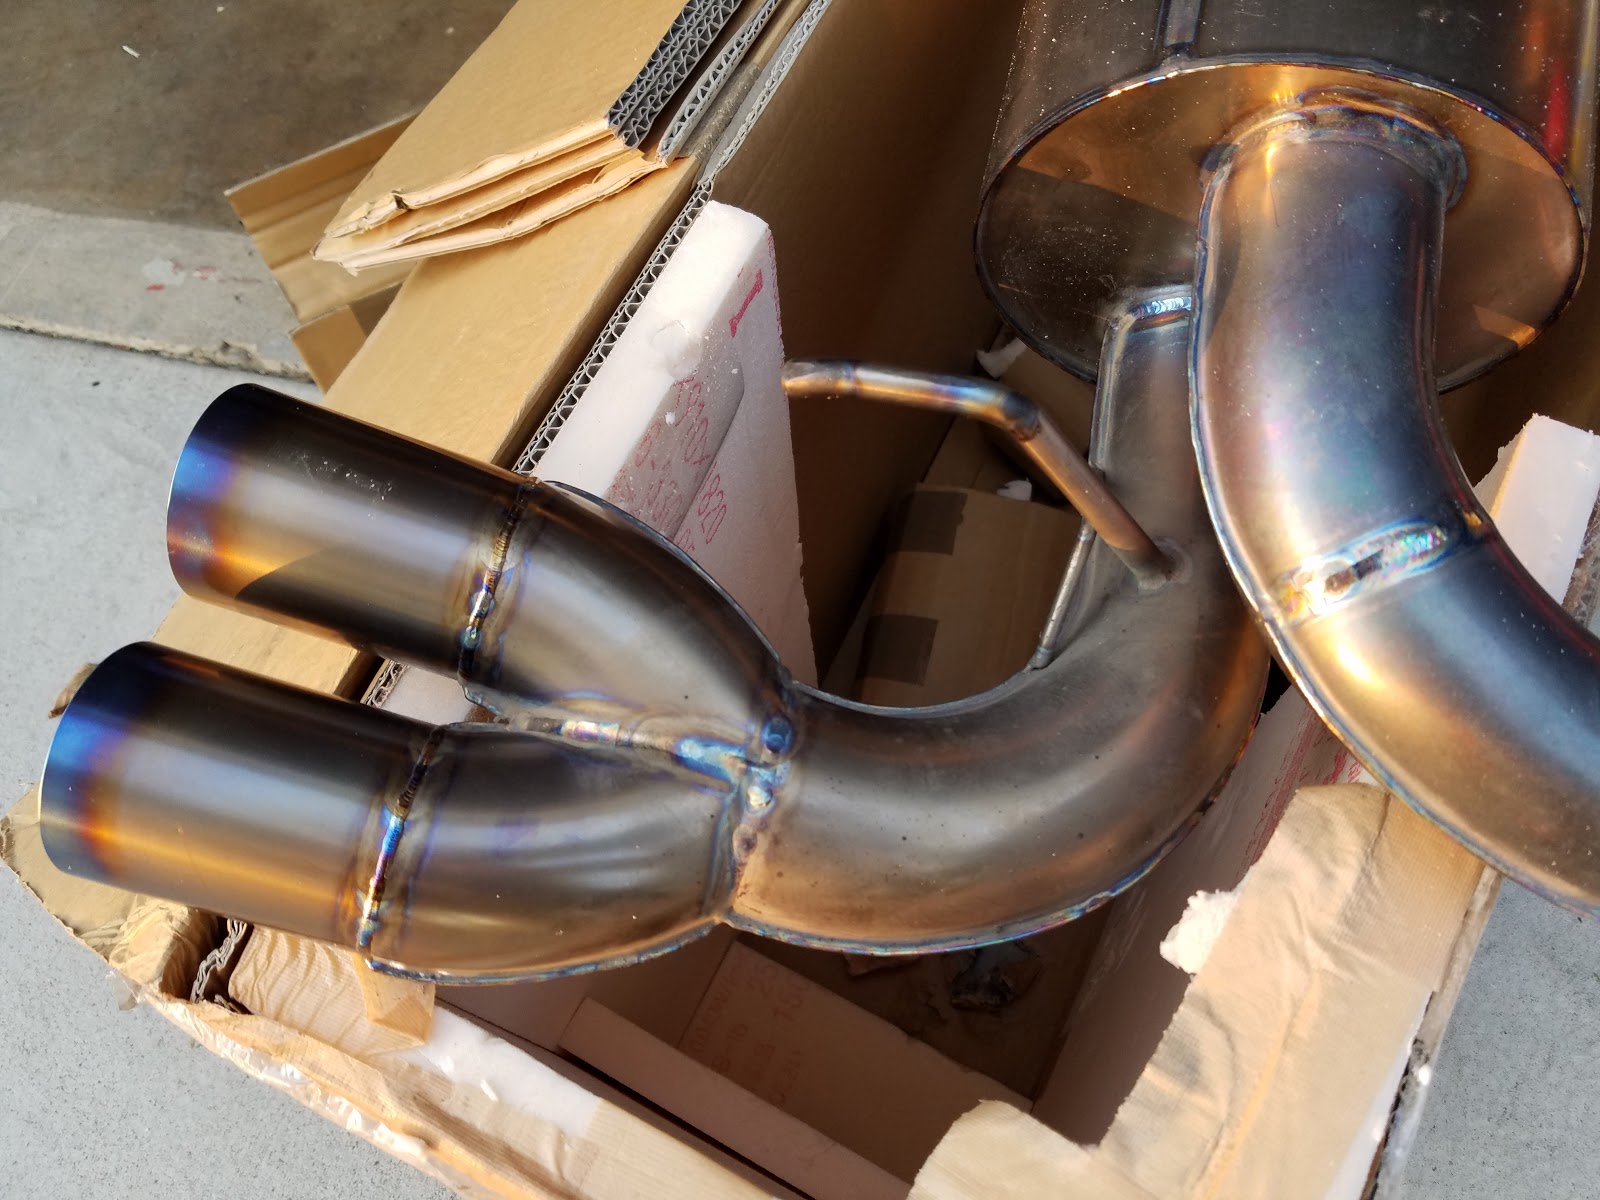
Old Sorcery exhaust came off and was quickly sold. I'm really gunna miss this thing. It had SUCH a unique wailing sound. Oh well, it went off to a good home.

For the time being I'm gunna use an ARC Ti exhaust i got from Regan. Its got an awesome sophisticated deepish grumble but then opens up around 5k. Sounds very similar to the e46 v8 m3. I'm happily much much more under-the-radar than I was before and can actually get on throttle when i drive it around town- unlike before i would lug around under 2k as not to draw too much attention to myself. This exhaust, while bigger in size, is actually only around 9lbs due to its thin walled titanium construction.


Also, last min before reinstall I built some carbon winglets and mounted them to the diffuser. Honestly, not a big fan once I saw them on the car..


Everything was finished in perfect timing for HFF mid-season and trip to Japan. I even had a few days to do final prep on the CRX and load it up on the trailer for Buttonwillow ...
 |
| washed clayed.. |
 |
| ...looking good |
I'm gunna finish this entry here, its a good stopping point. I have enough content for another couple and then ill be caught up to current.. I'm hoping to get at least another one down in the next few days depending on how much time i can carve out to write it.

Until then!