Thursday, November 6, 2014

Closer yet!


No posting hasn't meant no progress. A lot has happened in the past few weeks

   Work has been totally batshit hectic and on top of that had too move houses--- and on top of that had about a billion other things to attend too.  The only reason I'm able to sit at a computer an write up another entry is because things are thankfully finally starting to calm down again. Internet is up at my new place and theres no more boxes to move or pictures to hang so I feel like i should get post up before I forget anymore details...

As I was saying on my last post were on the tail end of the chassis repair and moving swiftly along into the fabrication portion of the build. This doesn't just mean cage fabrication but all the little things along the way. We'd already started and finished a few of these smaller projects along the way but it was almost more so we could have some sense of progress while the labor intensive stuff lumbered along at a snails pace. Now with the 'big stuff' being mopped up its nice to jump into the rest of it and get excited again.

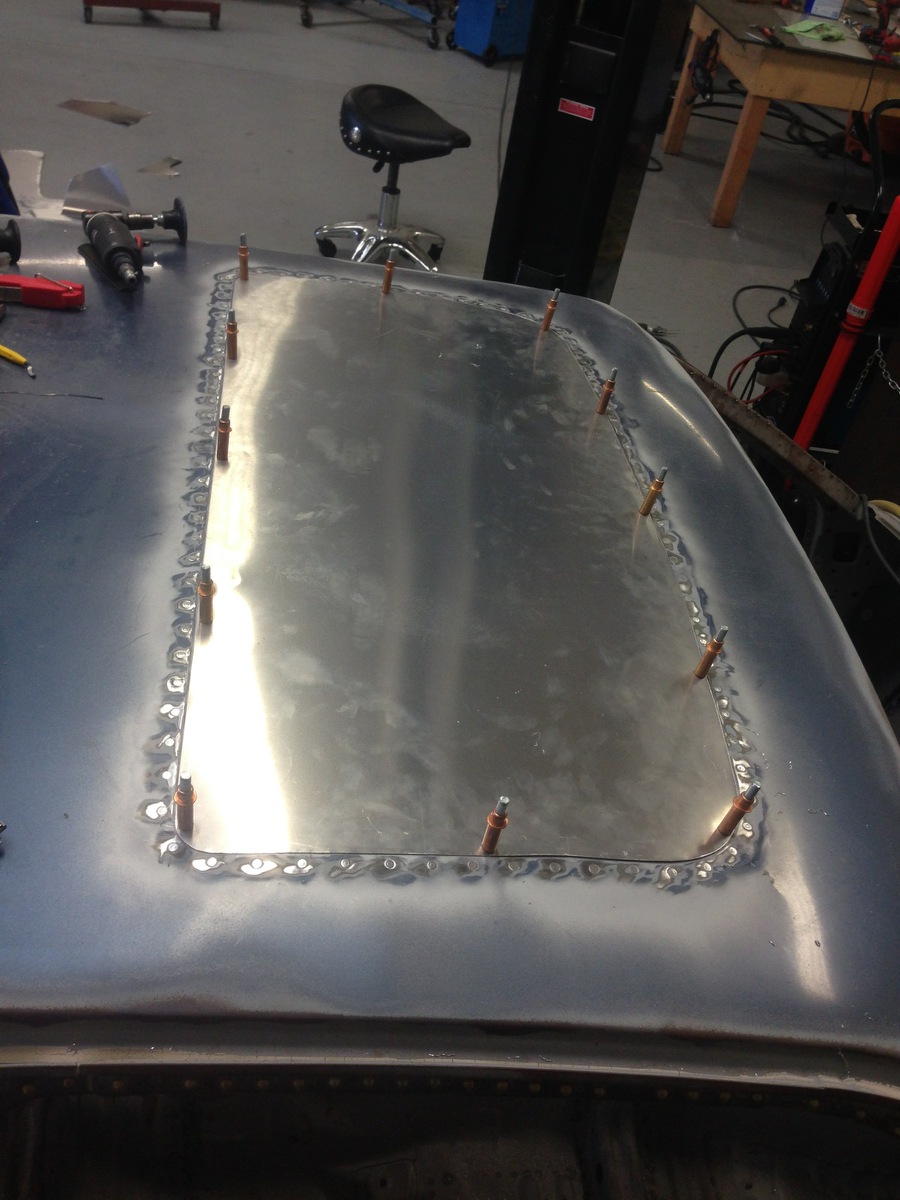
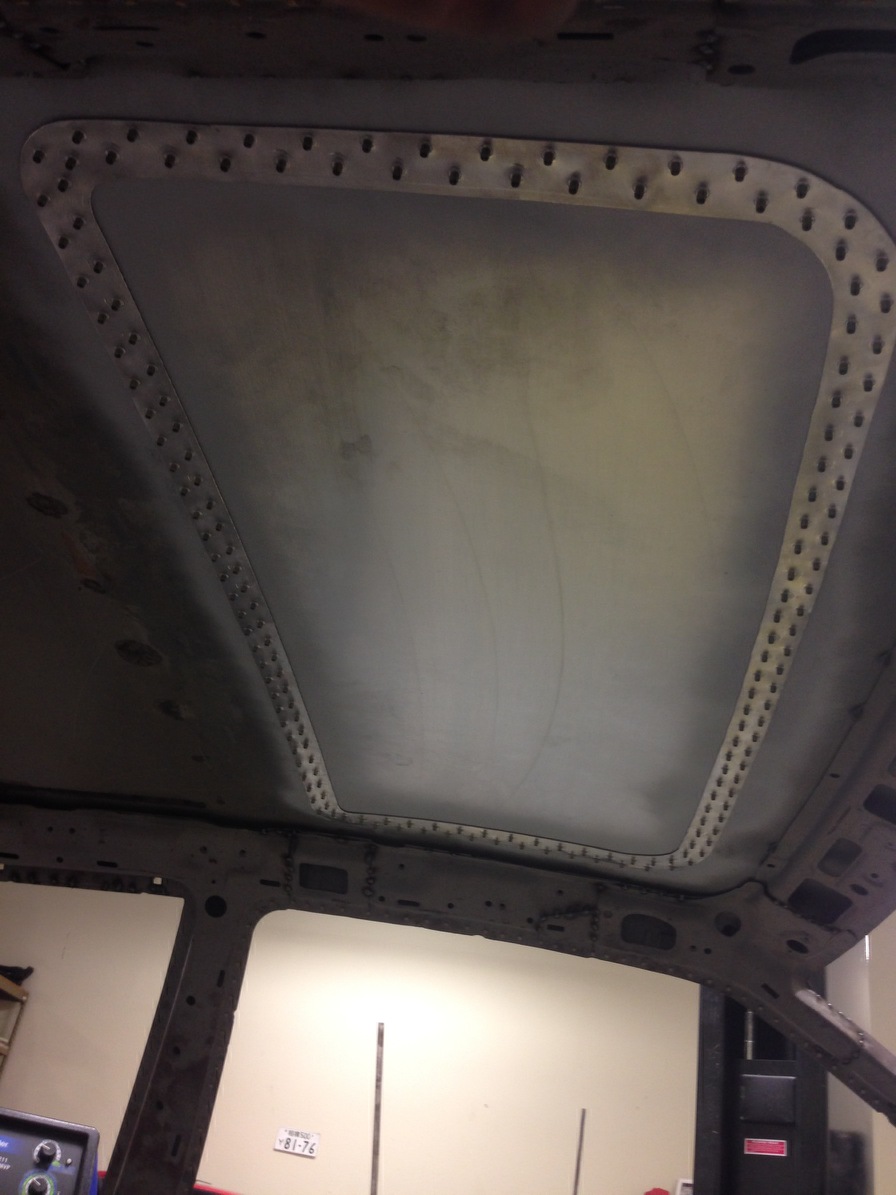
A perfect example is this lower window support. If you remember a few posts back we'd removed all the partitioning between the cabin and the trunk along with the rear speaker tray and trunk hinges. To recap; they were just dead weight since the trunk is to be totally removable from the car for reasons of rear wing badassery.

Instead of just leaving it a floppy-flemsy cross piece for the rear window to cling too Art fabbed up this totally awesome gusseted support. Stuff like this takes time and know how to get fit right, you'll notice the slight arch it must follow to attach evenly to the OEM metal, killed it.


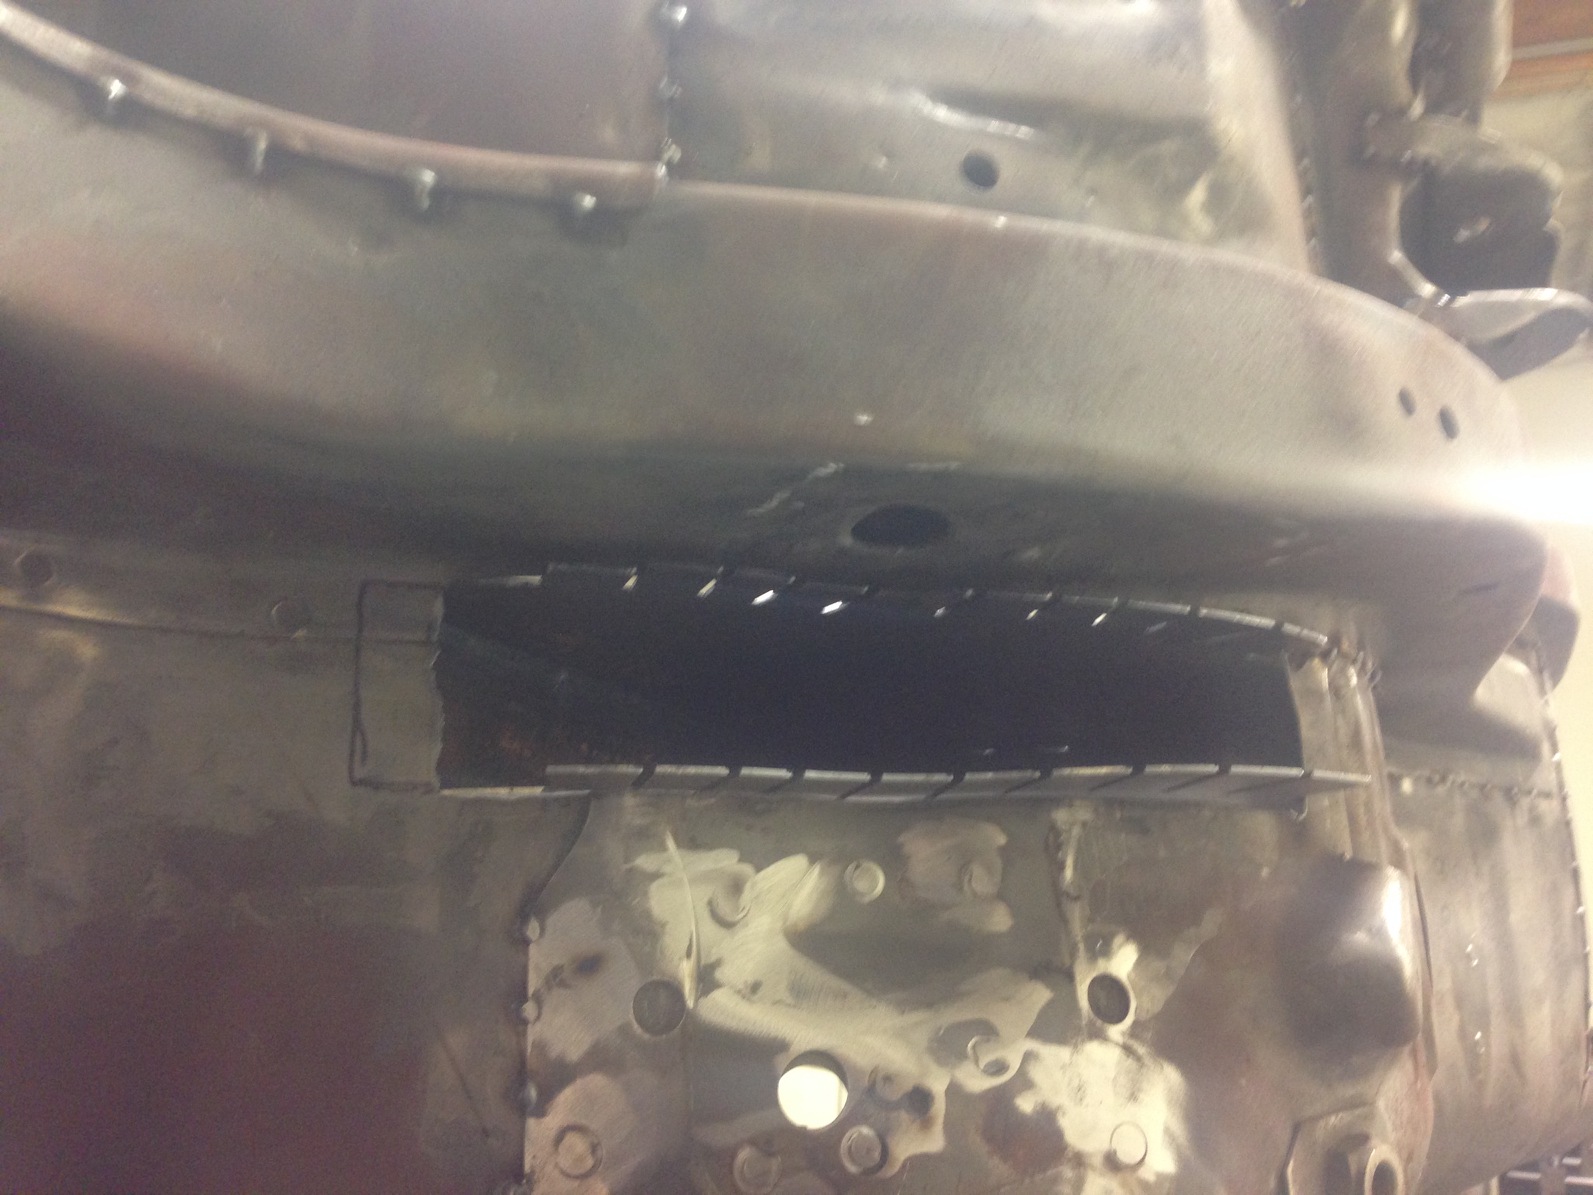
As we were moving along and prepping the 4 links to go in I almost by chance noticed a rust spot while looking down a hole into the 5th link support.


you can see it would have been easy too miss. This picture was take after we knocked a punch through it to see of it was indeed rusted.


Here (above) is Art trying to determine the extent of the damage...


The affected metal was cut out for replacement..

This part of the chassis deals with quite lot stress due to the nature of the 5-links set up on the ae86- its the backbone of the rear end and accounts for keeping the driveshaft aligned down the center of the car, the whole 3rd member wants to wag left and right as the suspension compresses and lightens under acceleration and braking and this is what anchors the fulcurm that stops it. On top of fixing the rust Art took the chance to make it triple beefy to keep everything stiff as possible


After that everything was measured, measured, measured, mocked, measured and finally the channels for the new extended 4link boxes were cut


Sitting pretty but not yet welded.. I noticed they actually offer these boxes for sale on the t3 site now. Your welcome world.

Heres a shot of the diff lifted almost into place to verify its alignment

And a detail of the underside before it was welded in. (car is sideways for the picture)


Finally welded into place for its final time

Links installed for illustration. 


Then THIS happened, Art came correct and got a lift installed. Its awesome! He's turning into a real shop.


--------intermission--------

After a few short hiatuses for Art to do some high end work on SEMA cars and for me to move my life to a different house, I got a call that my NSX was finally alive and breathing again with the new motor.

Heres a .gif me stoked too see it running for the first time. (SEMA build in the back ground)


-------intermission end----------


back to the build, plugging some holes... this one was for the brake master cyl. the other holes and trans tunnel will get handled soon.

After poking around some more I found some just forming rust on the rear valance at the back of the car.


After some discussion it was decided that "who need those anyways" the rear valance was cut out as well as the beat up lower part of the spare tire compartment


Note the completely horizontal 5th link, as discussed in previous posts.


You can see this opens up some interesting aero options.... :]

You may remember that I am going to run a 15 gallon "well cell" thats designed to sit in the spare tire tub. You can see above that the tub was cut out to build a cleaner, flatter surface for it too sit. After looking at this set-up more closely and its potential alternatives (read: $$$) there's a good compromise to be had somewhere in the middle.  Utilizing the parts I already own and Arts mad skillz I think were shaping up something that's going to be better in every way, more on this as it comes...


I also went and picked up my Origin 30mm fenders. I ordered these new because I didn't want to deal with repairing a used, fucked up pair. Turns out my 5 month wait for these was in vain because only after I got them to the shop and unwrapped them did I see that they too were cracked and would need repair.

 I called and emailed FRsport to tell them but apparently they have an iron clad company policy to screw people that actually buy legit parts and patiently wait for the back order to come in.  Dude, really guys... ?


 On another "aww, fuck" note I brought the cross member home and mocked it all up on the motor. Turns out the cross member was interfering with the oil pan and it'd need to come off again, WOMP.

steering rack hitting just under the passenger motor mount


A quick revision later and everything is looking good.

clean welds once again


 Finally, the sun roof plug went in too. This was another tedious job that takes craftsmanship too do correctly. Thank god Art lives on a diet of Redbull and Coldplay that somehow combine to give him the patience needed to do it

in progress

underside in progress


finished below


Smooth as a babies bum, Howard Hughes would be proud


Im ending this post with some 'blueprints' as Art calls them. They are typically how I communicate ideas about the car when im at work and hes cranking away in the shop.


Whatever, At least *I* think they are helpful.

Until next time!


Wednesday, October 1, 2014

Rhythm and the real deal Holyfield


Progress is coming along pretty fast now, we had a meeting and really threw down gauntlet  on the time-line. A game plan was laid out and Art has kicked it into high gear to hit the targets.

Jumping right in..

     If you'll remember I had some apprehension about cutting into the cross member for necessary motor clearance.  Generally you'll need to take out about 30% of the material from the cross section to clear the oil pan. This leaves you with a much thinner and less strong support member that you're now putting a hell of a lot more power through. I decided pretty early on that reinforcing it as much as possible now would pay off in replacing it down the line. 

 After discussing the best way to accomplish this Art welded on 3/8th" rolled steel plating along the cut section. After that he then created a template out of 16g plate


and tigged that to the bottom of them member. Seeing more room for beefing he stitched along the factory stamped creases and folds.


 What it feels like now is MUCH more substantial piece than even before it was cut. It added weight; but its all down low and exactly centered between the wheels, which is the best place to have it.

3/8th plating
Tig detail.


Stitching
Plate reinforcement. Drain holes still need to be drilled. It'll also get a clean up and a fresh coat of enamel


Plating weld detail.

  Moving back too the chassis side of things;
   All the firewall holes that'll no longer be needed will have to be plugged before painting. These holes came from factory and allowed things like heater core hoses, wiper motors, wire harnesses, master cylinders, ect interface through the firewall.  I'll be deleting everything but a small hole for electronics, one for fuel, and two provisions on the lower wells for the brake lines too hook up. Since I wont be needing any thing else I measured them and sent off an order too the water jetter for some plugs. The blue tape marks the specific sizes of the holes, strangely they were not all a uniform sizes. Once these come back they will be welded into place to seal off the cabin form heat, fumes and some noise.


On the other side of the firewall the factory puts all sorts of tabs and brackets to affix everything these econo-box needed.  Wiring harness, ECU, sound deadening, dash board hangers all have their own spot. Again, here, im not going to use any of these so the tabs do nothing but clutter up the interior. Cleaning up stuff like these go a long way for the 'finished' feeling when everything is back together.


Before:

 
All the tabs and brackets marked with and X for elimination


passenger side
After about 2 hours with a spotweld remover:


I grinded the remaining nubs smooth but forgot to take any pictures. Once the firewall plugs are welded and the interior gets a fresh coat of paint you wont be able too tell they were ever there.

All in all maybe about a pound of weight saving, not a lot but it all adds up


Remember the rust hole in the rain gutter under the wind shield? I dont think I ever took a close up picture but it was UGLY. Art dug a little deeper and found that it was actually worse than we'd originally thought


Basically the entire 8 inch piece had too be cut out to stop the cancer. It had even gone all the way through into the cabin of the car.


template was made and patched tacked in...

rough fit
 Cleaned up..


and sealed 
Patch work from the inside..
This hole would have been dripping directly onto the OEM fuse block and causing all sorts of problems

Next thing to go was the fuel door. Since I'm going to use a fuel cell in the trunk, I'll no longer need an OEM fuel door and filler neck port. I wanted a clean solution instead of just shutting it and removing the pull wire.

First thing that would need to be done was sealing off the circular provision that the filler neck used to pass through. If we left it, the high pressure air from the wheel well would be constantly trying to equalize itself with the low pressure inside thereby blowing dust and grime into the cabin.

hole to be blocked
Tracing tool connected to a plasma cutter
Clean and cut

block off welded into place.
For the outer door Art really wanted a chance to use flush aircraft rivets.

building the hang frame

detail from the back side after riveting into place
Finalized aluminum fuel door with flush aircraft rivets, a lot of work and time but really cool.

and from the outside


 The next big step was handling that big ugly rust hole behind the drivers seat on the wheel well. You can see in the picture below taken from inside the car with the well on top and the spring pedestal just to the left.  Quite a substantial chunk of metal had to be cut out
Its a bit difficult too tell but the rust was between two layers of sheet metal, upper part of this picture is the wheel well (car is on its side)


After figuring out the best plan of attack Art started rebuilding the structure that had been cut out, especially difficult was making sure that to reenforce enough that I could retain usability of the upper perch if I wanted too.


 This shot is up into the wheel well, you can see the frame rail and the OEM spring perch cup, some of the perch surround was affected and had to be cut out too.


Templates were made to patch these holes with new healthy metal

Here you can see the other gaping hole to the left is the old roll cage mount that Art had cut out.

After:
 rebuilt and patched

And from the bottom:
new metal welded into the perch surround


 New metal welded into the body side.

Old drag bar cage holes Cut pounded down and patched too
Once fuel cell and lines and paint are added these will blend in with the rest of the interior.

 PROGRESS!


In other parts news the 4-link boxes FINALLY showed up.


Before
They look good but seemed a tad bit flimsy especially where the heim joint would be bolted though. I don't want to deal with these ever again so we decided to reenforce the bolt through holes.

Plates made up before being tigged on

tigging them on

The 4link will also have a reinforcement bar connecting them laterally, were also adding bars to connect the boxes directly to the cage or frame. Deciding on the best way to do this will be determined once we can see how everything is coming together.


Mocked up the seating position, albeit a little premature I was curious too how much helmet room and leg room there'd be for the pedal box, good news is.. theres a lot.


 Fixed seating position and bein a tall ass mofo means ill probably be the only person that'll be able to drive the car. Perfect.


There's a bit more but some bigger updates coming soon so ill save it for then.


Ending this entry with Kyle's awesome JDM EF hatch. Love this thing..